Input

book: Create a structured PDF document with headings, chapters, etc.
webpage: Specifies that the HTML sources are unstructured (plain web pages.) A page break is inserted between each file or URL in the output.
continuous: Specifies that the HTML sources are unstructured (plain web pages.) No page breaks are inserted between each file or URL in the output.
Title of the document for the front page.
Extract the first heading of the document and use it as title. If checked the title field has no effect.
The title image or HTML page. These file has to be an attachments!
Specify document version to be displayed on the title page.
Intellectual property owner of this document.
Copyright notice for this document.
Information about who and when modified the document are applied at the end.

Output

Specifies the output format.
Grayscale document  Title page
Compression :   JPEG big images 

Pagina

 
User defined page size 
Choose one of the predefined standard sizes or select user defined.
Specifies the page size using a standard name or in points (no suffix or ##x##pt), inches (##x##in), centimeters (##x##cm), or millimeters (##x##mm).
Set the target browser width in pixels (400-1200). This determines the page scaling of images.
   2-Sided   Landscape


Specifies the margin size using points (no suffix or ##x##pt), inches (##x##in), centimeters (##x##cm), or millimeters (##x##mm). Keep empty for default value.
Left
Middle
Right
Sets the page header to use on body pages.
Left
Middle
Right
Sets the page footer to use on body pages.

Indice

Sets the number of levels in the table-of-contents. Empty for unlimited levels.
   Numbered headings Check to number all of the headings in the document.
Sets the title for the table-of-contents. Empty for default title.
Left
Middle
Right
Sets the page header to use on table-of-contents pages.
Left
Middle
Right
Sets the page footer to use on table-of-contents pages.

Colors

Enter the HTML color for the body (background).
Enter the image file for the body (background). These file has to be an attachments!
Enter the HTML color for the text.
Sets the color of links.
Enables generation of links in PDF files.

Fonts

Set the default size of text.
Set the spacing between lines of text.
Choose the default typeface (font) of text.
Choose the default typeface (font) of headings.
Set the size of header and footer text.
Choose the font for header and footer text.
Change the encoding of the text in document.
Check to embed font in the output file.

PDF

Controls the initial viewing mode for the document.
Document: Displays only the docuemnt pages.
Outline: Display the table-of-contents outline as well as the document pages.
Full-screen: Displays pages on the whole screen; this mode is used primarily for presentations.
Controls the initial layout of document pages on the screen.
Single: Displays a single page at a time.
One column: Displays a single column of pages at a time.
Two column left/right: Display two columns of pages at a time; the first page is displayed in the left or right column as selected.
Choose the initial page that will be shown.

Security

Check to number all of the headings in the document.
 Versione stampabile   Modify
 Copy   Annotate
Specifies the document permissions.
Specifies the user password to restrict viewing permissions on this PDF document. Empty for no encryption.
Specifies the owner password to control who can change document permissions etc. If this field is left blank, a random 32-character password is generated so that no one can change the document.

Expert

Specify language to use for date and time format.
Shrink code blocks on page.
Show line numbers for code blocks.
Make spaces visable by dots (·) instead of white spaces.
Make line breaks visable by a extra character (¶) at the end.
Enable this feature if you searching for problems or intent to report a bug report

About

Version 2.4.2 (MoinMoin 1.9.7)


MoinMoin - Generate PDF document using HTMLDOC

This action script generate PDF documents from a Wiki site using
the HTMLDOC (http://www.htmldoc.org) software packages which has
to be preinstalled first.

Copy this script in your's MoinMoin action script plugin directory.

Thanks goes to Pascal Bauermeister who initiated the implementaion.
Lot of things changes since then but the idear using HTMLDOC is the
main concept of this implementation.

Please visit the homepage for further informations:
http://moinmo.in/ActionMarket/PdfAction

@copyright: (C) 2006 Pascal Bauermeister
@copyright: (C) 2006-2010 Raphael Bossek <raphael.bossek@solutions4linux.de>
@license: GNU GPL, see COPYING for details


Italiano English
Modifica History Actions

BigBlueButton

Big Blue Button

Big Blue Button è un software open source usato da organizzazioni e università per effettuare conferenze, lezioni online o anche semplicemente scambiarsi delle idee. Al suo interno c'è tutto, un centralino asterisk che gestisce la conferenza sulla parte audio, un server video Red 5 che gestisce il video degli utenti che usano la webcam e dei video che vengono caricati, una implementazione di openoffice che permette di caricare una gran moltitudine di contenuti e li rende presentabili nell'interfaccia. Tutto questo è reso facile e intuitivo attraverso un applet Flash che caricato sul browser permette di fruire del servizio.

E' richiesto almeno Flash 10.3

Ora vi spiegherò con una piccola guida come si fa ad utilizzare BBB:

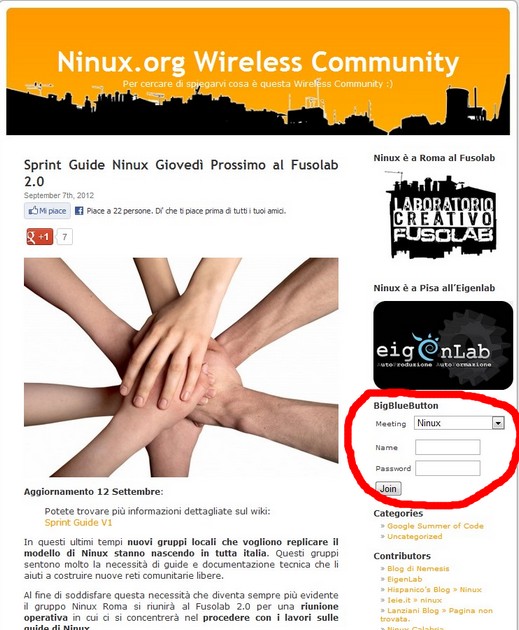
andiamo su blog.ninux.org, qui troveremo alla nostra destra una piccola finestra
Untitled 2.jpg

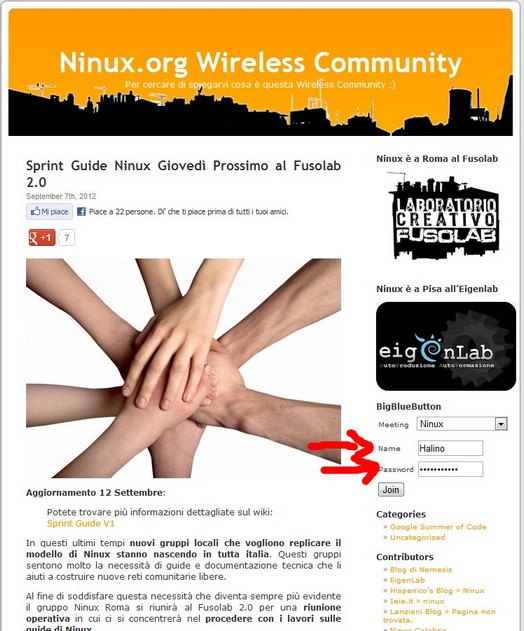
inseriamo al suo interno un username a nostra scelta nel campo "name" e la password, facendo la seguente distinzione:

"ospite" per accedere come partecipante "gianduiotto" invece come presentatore

La differenza fra questi due ruoli è che il primo può parlare, avviare la webcam e scrivere in chat. Il secondo può caricare materiale, decidere chi può parlare e chi no e usare il puntatore laser. Il ruolo può essere scambiato all'interno cedendo il controllo a un altro utente connesso, ci può essere un solo presentatore alla volta.
Untitled 4.jpg

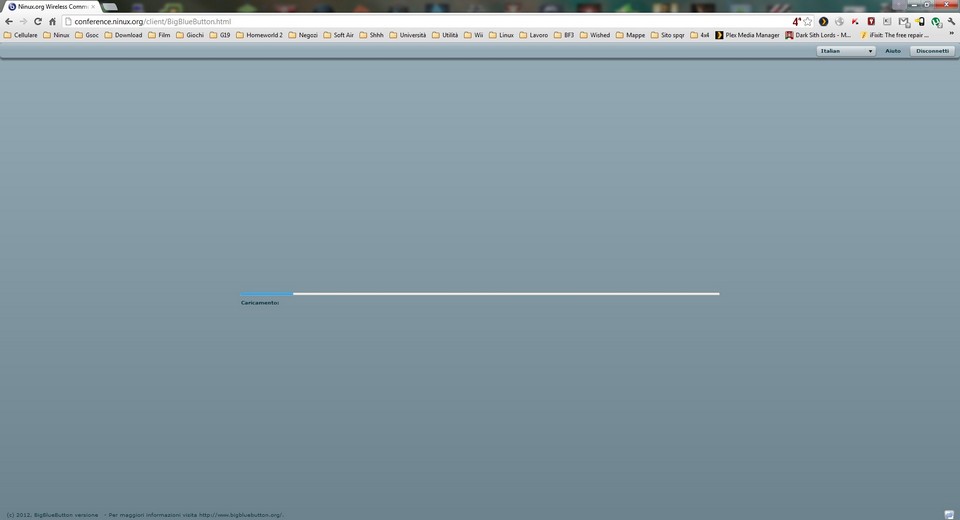
Fatto questo ci comparirà la schermata di caricamento, aspettiamo.
Untitled 5.jpg

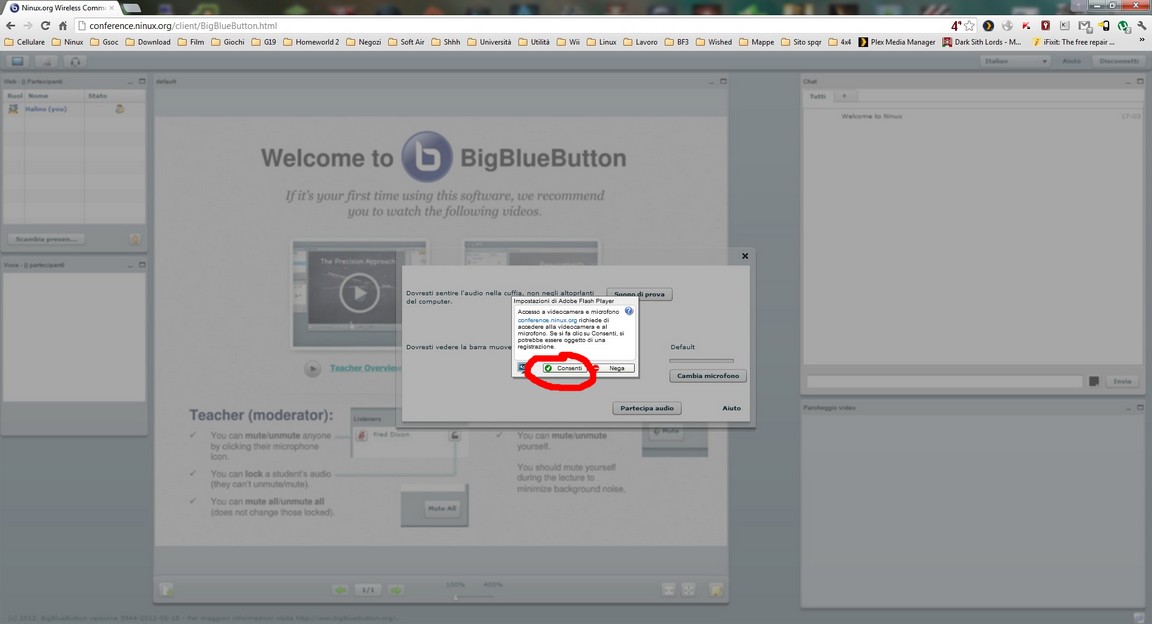
Il plugin vi chiederà se BBB potrà aver accesso alla vostra fotocamera e al microfono, clicchiamo consenti.
Untitled 6.jpg

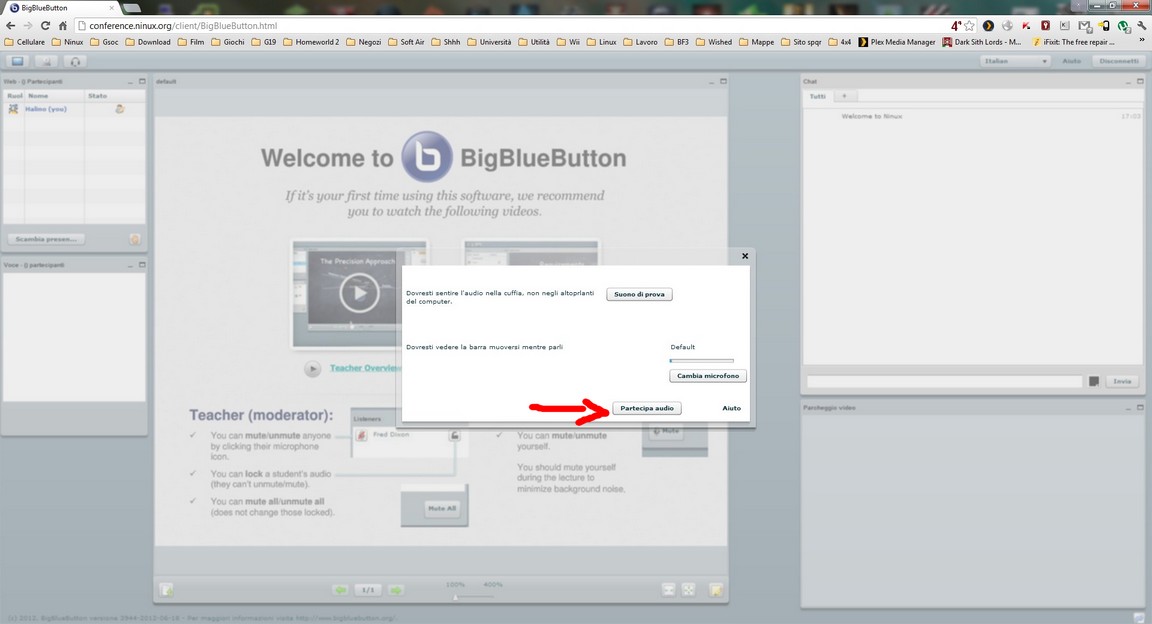
Fatto questo dovremo controllare le impostazioni audio per far in modo che il nostro microfono sia configurato correttamente, uno volta fatto possiamo cliccare su partecipa audio.
Untitled 7.jpg

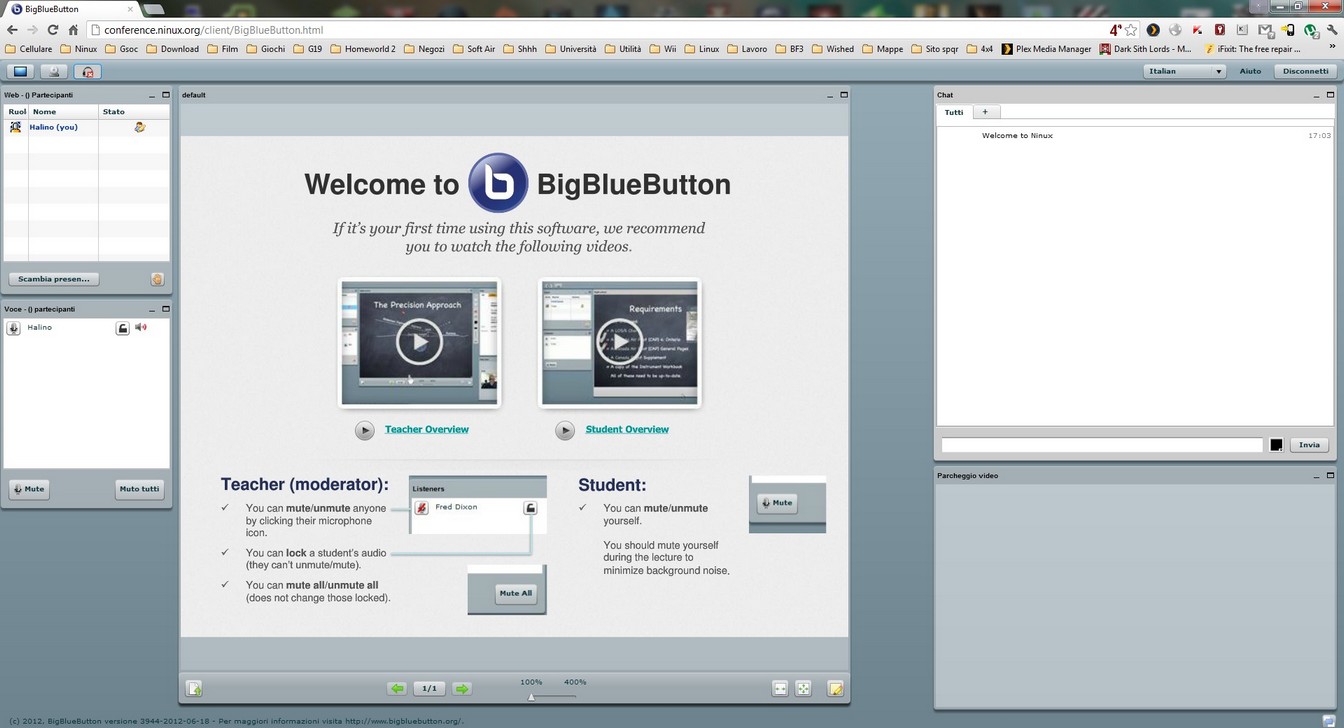
Siamo dentro!

In alto a sinistra troverete le icone per attivare e disattivare audio e webcam, subito sotto l'elenco dei partecipanti alla conferenza e dopo l'elenco delle persone in chat audio. A destra abbiamo la chat della conferenza e sotto il "parcheggio video" dove compariranno le webcam dei partecipanti.
Untitled 8.jpg

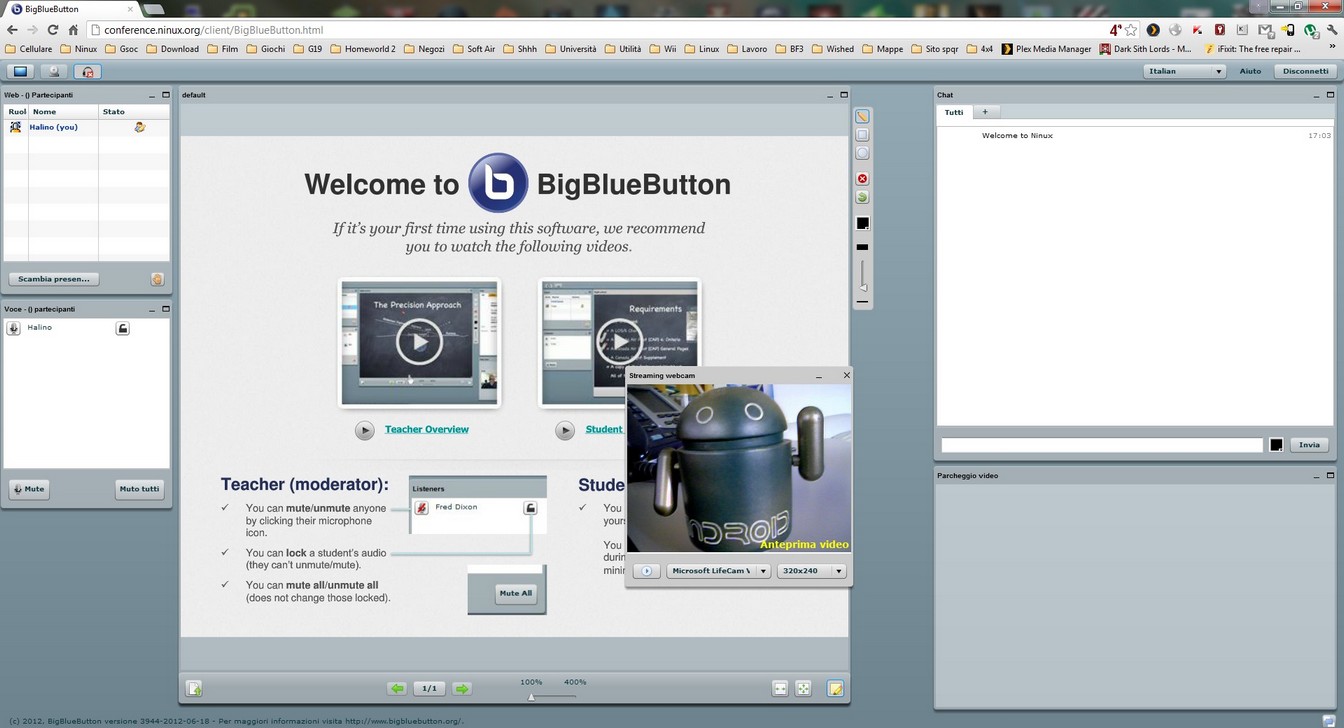
Per attivare la webcam facciamo clic sul bottone in alto a sinistra, ci comparirà un piccola finestra con visualizzata la nostra webcam. Ancora non stiamo trasmettendo, qui possiamo scegliere l'origine del flusso video e la dimensione a cui inviare lo stream. Teniamo conto che la nostra banda in upload limiterà la qualità video, quindi non esageriamo con la risoluzione o avremo problemi di connessione. Fatto questo clicchiamo sul tasto in basso a sinistra in questa finestra con il simbolo "play" e incominceremo a inviare il video alle persone nella conferenza.
Untitled 11.jpg

Ogni finestra all'interno di BBB si comporta in maniera individuale e indipendente dalle altre, può essere spostata, ridotta a icona o ridimensionata. In tal modo ogni utente può scegliere cosa vedere, cosa no e come gestire la propria sessione.

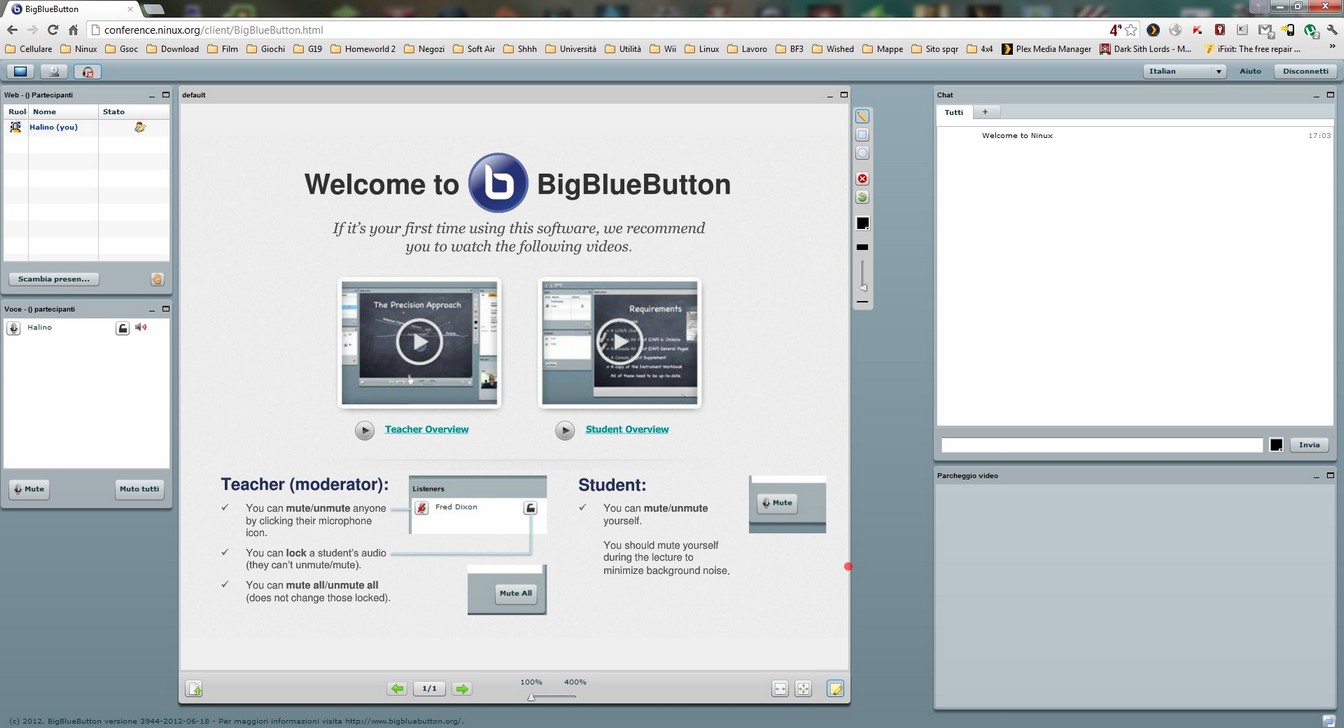
Il presentatore ha accesso ad alcune funzioni in più, potrete notare un icona in basso a destra nella schermata centrale che farà comparire un menu a scomparsa a destra di tale finestra. Qui troveremo gli strumenti che ci permettono di scrivere e disegnare all'interno della schermata di presentazione. In basso a sinistra di tale schermata troveremo invece il tasto che ci permette di caricare materiale in remoto e di scegliere quale visualizzare sulla lavagna virtuale.
Untitled 9.jpg

Appena entrati troverete due video da poter vedere che spiegano più a fondo il funzionamento di BBB.

Buon Lavoro!