Input

book: Create a structured PDF document with headings, chapters, etc.
webpage: Specifies that the HTML sources are unstructured (plain web pages.) A page break is inserted between each file or URL in the output.
continuous: Specifies that the HTML sources are unstructured (plain web pages.) No page breaks are inserted between each file or URL in the output.
Title of the document for the front page.
Extract the first heading of the document and use it as title. If checked the title field has no effect.
The title image or HTML page. These file has to be an attachments!
Specify document version to be displayed on the title page.
Intellectual property owner of this document.
Copyright notice for this document.
Information about who and when modified the document are applied at the end.

Output

Specifies the output format.
Grayscale document  Title page
Compression :   JPEG big images 

Pagina

 
User defined page size 
Choose one of the predefined standard sizes or select user defined.
Specifies the page size using a standard name or in points (no suffix or ##x##pt), inches (##x##in), centimeters (##x##cm), or millimeters (##x##mm).
Set the target browser width in pixels (400-1200). This determines the page scaling of images.
   2-Sided   Landscape


Specifies the margin size using points (no suffix or ##x##pt), inches (##x##in), centimeters (##x##cm), or millimeters (##x##mm). Keep empty for default value.
Left
Middle
Right
Sets the page header to use on body pages.
Left
Middle
Right
Sets the page footer to use on body pages.

Indice

Sets the number of levels in the table-of-contents. Empty for unlimited levels.
   Numbered headings Check to number all of the headings in the document.
Sets the title for the table-of-contents. Empty for default title.
Left
Middle
Right
Sets the page header to use on table-of-contents pages.
Left
Middle
Right
Sets the page footer to use on table-of-contents pages.

Colors

Enter the HTML color for the body (background).
Enter the image file for the body (background). These file has to be an attachments!
Enter the HTML color for the text.
Sets the color of links.
Enables generation of links in PDF files.

Fonts

Set the default size of text.
Set the spacing between lines of text.
Choose the default typeface (font) of text.
Choose the default typeface (font) of headings.
Set the size of header and footer text.
Choose the font for header and footer text.
Change the encoding of the text in document.
Check to embed font in the output file.

PDF

Controls the initial viewing mode for the document.
Document: Displays only the docuemnt pages.
Outline: Display the table-of-contents outline as well as the document pages.
Full-screen: Displays pages on the whole screen; this mode is used primarily for presentations.
Controls the initial layout of document pages on the screen.
Single: Displays a single page at a time.
One column: Displays a single column of pages at a time.
Two column left/right: Display two columns of pages at a time; the first page is displayed in the left or right column as selected.
Choose the initial page that will be shown.

Security

Check to number all of the headings in the document.
 Versione stampabile   Modify
 Copy   Annotate
Specifies the document permissions.
Specifies the user password to restrict viewing permissions on this PDF document. Empty for no encryption.
Specifies the owner password to control who can change document permissions etc. If this field is left blank, a random 32-character password is generated so that no one can change the document.

Expert

Specify language to use for date and time format.
Shrink code blocks on page.
Show line numbers for code blocks.
Make spaces visable by dots (·) instead of white spaces.
Make line breaks visable by a extra character (¶) at the end.
Enable this feature if you searching for problems or intent to report a bug report

About

Version 2.4.2 (MoinMoin 1.9.7)


MoinMoin - Generate PDF document using HTMLDOC

This action script generate PDF documents from a Wiki site using
the HTMLDOC (http://www.htmldoc.org) software packages which has
to be preinstalled first.

Copy this script in your's MoinMoin action script plugin directory.

Thanks goes to Pascal Bauermeister who initiated the implementaion.
Lot of things changes since then but the idear using HTMLDOC is the
main concept of this implementation.

Please visit the homepage for further informations:
http://moinmo.in/ActionMarket/PdfAction

@copyright: (C) 2006 Pascal Bauermeister
@copyright: (C) 2006-2010 Raphael Bossek <raphael.bossek@solutions4linux.de>
@license: GNU GPL, see COPYING for details


Italiano English
Modifica History Actions

FirmwareNinux

Firmware Ninux

progetto

Firmware OpenWrt con configurazione e grafica personalizzate ninux.org- E' in corso d'opera anche la realizazione di un firmware "next generation" FirmwareNG.

features

  • olsrd + plugins and mdns plugin !
  • webif con grafica Ninux.org
  • Ninux Dynamic DNS
  • iproute2
  • snmp
  • horst
  • tcpdump
  • wl (solo WRT54G)
  • file di configurazione quasi-pronti

screenshots

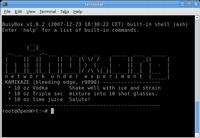
Istruzioni generiche per tutti i routers!!!

Dopo che installate l'immagine:

  • cambiate l'IP dell'IF Ninux in /etc/config/network

  • cambiate l'IP dell'interfaccia wired /etc/config/network

  • cambiate HNA di olsr opportunamente in /etc/config/olsrd

Oppure le stesse modifiche fatele tutte da interfaccia grafica

Prendete indirizzi IP liberi ed usate questa pagina: GestioneIndirizzi

sviluppo

Vedere https://svn.ninux.org/ninuxdeveloping e SvnHowTo

compilare

$ svn co svn://svn.openwrt.org/openwrt/branches/backfire openwrt-backfire
$ cd openwrt
$ echo "src-svn zzzninux https://svn.ninux.org/svn/ninuxdeveloping/packages" >> feeds.conf.default
$ ./scripts/feeds update
$ ./scripts/feeds install -a
$ make menuconfig 

Nel menù:

  • scegliere i pacchetti ninux-* in Administration

$ make

Note: To build an full openwrt with all packages, ignoring the failing packages, add a IGNORE_ERRORS=m to the make call. This will let continiue the build, even if a single packed marked with “m” failed to build.

$ make IGNORE_ERRORS=m

Per compilare solo un pacchetto basta andare nella directory principale, fare un

make menuconfig

e selezionare solo il pacchetto da compilare (selezionarlo come Modulo).

Per compilare il pacchetto poi basta lanciare (sempre dalla directory principale) il comando

make package/NOMEPACCHETTO-compile

How to Add a Netfilter Extension to the firmware

Some Netfilter Extension are not in the OpenWRT toolchain.

To add nome edit the file include/netfilter.mk

andare alla sezione #extra

Qui c'è una riga per ogni estensione di Netfilter che viene caricata nel firmware quando si seleziona il modulo kmod-netfilter-extra

In questo esempio abbiamo aggiunto il modulo di iptables hashlimit, abbiamo quindi aggiunto questa riga:

$(eval $(call nf_add,IPT_EXTRA,CONFIG_NETFILTER_XT_MATCH_HASHLIMIT, $(P_XT)xt_hashlimit))

Dove CONFIG_NETFILTER_XT_MATCH_HASHLIMIT è il simbolo del modulo del kernel che vogliamo aggiungere. Per trovarlo prendete i sorgenti di un Vanilla Kernel, andate nei menu con make menuconfig e quando il modulo che vi interessa è selezionato selezionate help e troverete una dicitura tipo Symbol: NETFILTER_XT_MATCH_HASHLIMIT

Per trovare cosa scrivere dove mettiamo xt_hashlimit dovete compilare il vostro vanilla kernel, poi andiamo in net/netfilter e vediamo come si chiama l'oggetto .o del modulo kernel che ci interessa, nel nostro caso il nome era xt_hashlimit.o

Quindi, aggiunta questa singola riga al file include/netfilter.mk controlliamo che vada tutto bene facendo:

make menuconfig

selezioniamo iptables-mod-extra che si trova dentro base-system -> iptables selezioniamo kmod-ipt-extra che si trova dentro kernel-modules -> Netfilter Extensions

Fatto questo proviamo a compilare i pacchetti per vedere se va tutto liscio

make package/kernel-clean V=99
make package/kernel-compile V=99
make package/iptables-clean V=99
make package/iptables-compile V=99

se non ci sono errori possiamo compilare tutto il firmware con make ed il nuovo firmware avrà dentro il modulo di Netfilter che abbiamo aggiunto

installazione da remoto

Try at yuor own risk!!!! (La procedura è stata testata solo su schede Alix)

E' possibile aggiornare il firmware da remoto con il seguente comando:

ssh root@(indirizzo della scheda) 'dd of=/dev/hda bs=512'< openwrt.image