Input

book: Create a structured PDF document with headings, chapters, etc.
webpage: Specifies that the HTML sources are unstructured (plain web pages.) A page break is inserted between each file or URL in the output.
continuous: Specifies that the HTML sources are unstructured (plain web pages.) No page breaks are inserted between each file or URL in the output.
Title of the document for the front page.
Extract the first heading of the document and use it as title. If checked the title field has no effect.
The title image or HTML page. These file has to be an attachments!
Specify document version to be displayed on the title page.
Intellectual property owner of this document.
Copyright notice for this document.
Information about who and when modified the document are applied at the end.

Output

Specifies the output format.
Grayscale document  Title page
Compression :   JPEG big images 

Pagina

 
User defined page size 
Choose one of the predefined standard sizes or select user defined.
Specifies the page size using a standard name or in points (no suffix or ##x##pt), inches (##x##in), centimeters (##x##cm), or millimeters (##x##mm).
Set the target browser width in pixels (400-1200). This determines the page scaling of images.
   2-Sided   Landscape


Specifies the margin size using points (no suffix or ##x##pt), inches (##x##in), centimeters (##x##cm), or millimeters (##x##mm). Keep empty for default value.
Left
Middle
Right
Sets the page header to use on body pages.
Left
Middle
Right
Sets the page footer to use on body pages.

Indice

Sets the number of levels in the table-of-contents. Empty for unlimited levels.
   Numbered headings Check to number all of the headings in the document.
Sets the title for the table-of-contents. Empty for default title.
Left
Middle
Right
Sets the page header to use on table-of-contents pages.
Left
Middle
Right
Sets the page footer to use on table-of-contents pages.

Colors

Enter the HTML color for the body (background).
Enter the image file for the body (background). These file has to be an attachments!
Enter the HTML color for the text.
Sets the color of links.
Enables generation of links in PDF files.

Fonts

Set the default size of text.
Set the spacing between lines of text.
Choose the default typeface (font) of text.
Choose the default typeface (font) of headings.
Set the size of header and footer text.
Choose the font for header and footer text.
Change the encoding of the text in document.
Check to embed font in the output file.

PDF

Controls the initial viewing mode for the document.
Document: Displays only the docuemnt pages.
Outline: Display the table-of-contents outline as well as the document pages.
Full-screen: Displays pages on the whole screen; this mode is used primarily for presentations.
Controls the initial layout of document pages on the screen.
Single: Displays a single page at a time.
One column: Displays a single column of pages at a time.
Two column left/right: Display two columns of pages at a time; the first page is displayed in the left or right column as selected.
Choose the initial page that will be shown.

Security

Check to number all of the headings in the document.
 Versione stampabile   Modify
 Copy   Annotate
Specifies the document permissions.
Specifies the user password to restrict viewing permissions on this PDF document. Empty for no encryption.
Specifies the owner password to control who can change document permissions etc. If this field is left blank, a random 32-character password is generated so that no one can change the document.

Expert

Specify language to use for date and time format.
Shrink code blocks on page.
Show line numbers for code blocks.
Make spaces visable by dots (·) instead of white spaces.
Make line breaks visable by a extra character (¶) at the end.
Enable this feature if you searching for problems or intent to report a bug report

About

Version 2.4.2 (MoinMoin 1.9.7)


MoinMoin - Generate PDF document using HTMLDOC

This action script generate PDF documents from a Wiki site using
the HTMLDOC (http://www.htmldoc.org) software packages which has
to be preinstalled first.

Copy this script in your's MoinMoin action script plugin directory.

Thanks goes to Pascal Bauermeister who initiated the implementaion.
Lot of things changes since then but the idear using HTMLDOC is the
main concept of this implementation.

Please visit the homepage for further informations:
http://moinmo.in/ActionMarket/PdfAction

@copyright: (C) 2006 Pascal Bauermeister
@copyright: (C) 2006-2010 Raphael Bossek <raphael.bossek@solutions4linux.de>
@license: GNU GPL, see COPYING for details


Italiano English
Modifica History Actions

HowToConfigurazioneTpLinkStepByStep

HowTo Configurazione TpLink Step By Step

by Alepad e Clauz

This howto explains how to configure an OpenWrt enabled tp-link wr1043nd device to support the connections to both a community network with private IP addresses such as ninux.org and to an Internet Service Provider which also makes use of the private IPv4 space (such as Fastweb in Italy).

Requirements

Modalità Wi-Fi “n”: it’s not enabled

Model: TPLINK TL-WR1033ND

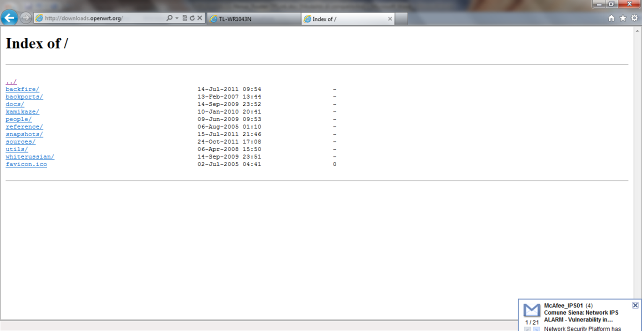
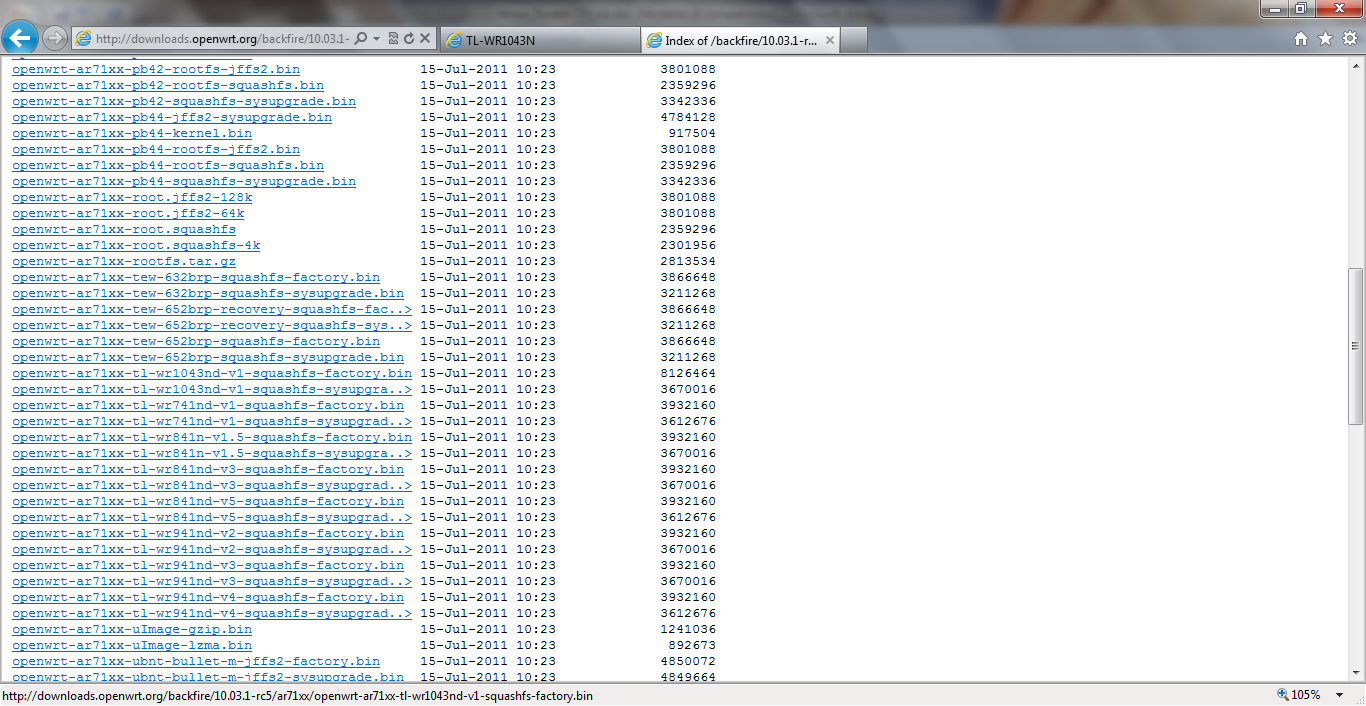
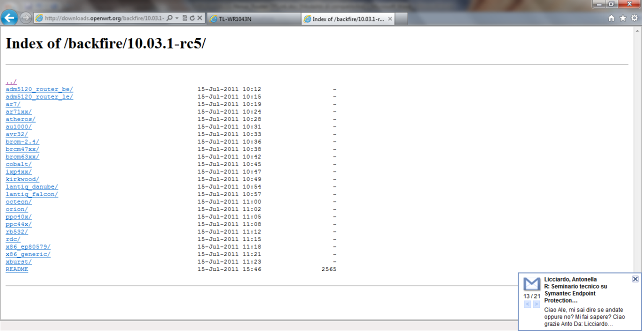
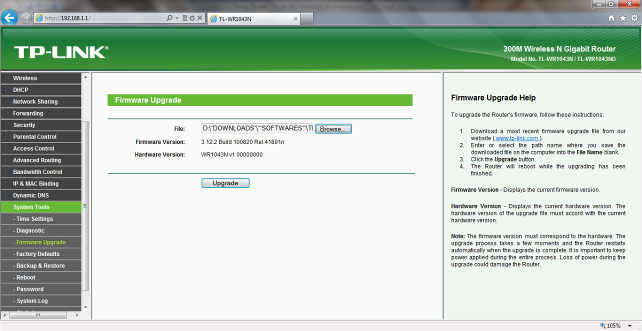
Firmware Flash updrage from: downloads.openwrt.org (DO NOT GO IN OTHER PLACES !!)

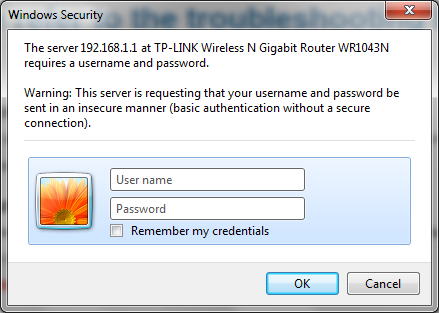
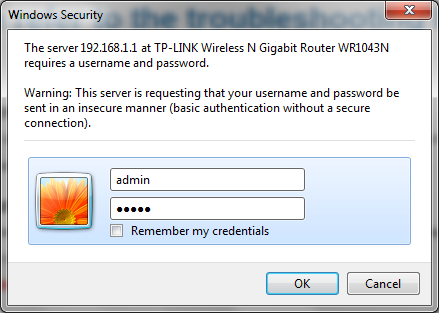
IP Default: 192.168.1.1 (admin, admin)

Browsers Certified: Firefox and IE9

DEfintion: ISP Router

Internal Router

Device Phisiscal Configuration

WAN: to Connect to Public ISP LAN1: VLAN for Direct to ISP Device Connectio (Eg. Peer to Peer out of Ninux !) LAN2: Free for Pc inside Ninux LAN3: Free for Pc Inside Ninux LAN4: Ninux Ponte Radio Antenna/Router

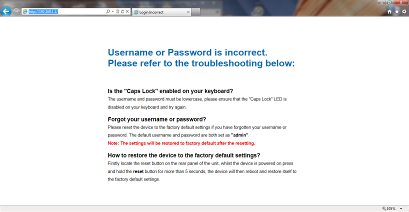
INIZIALIZATION AND FIRMWARE UPGRADE
1000020100000199000000D49B046392.png

10000000000001B700000139FE565CC4.png

10000000000001B7000001398779C093.png

10000201000002820000014B4DBEC569.png

10000201000002820000014B15E43B37.png

10000201000002820000014B0DA86EE6.png

1000000000000556000002C2352BA70B.png

10000201000002820000014B1D24FAAC.png

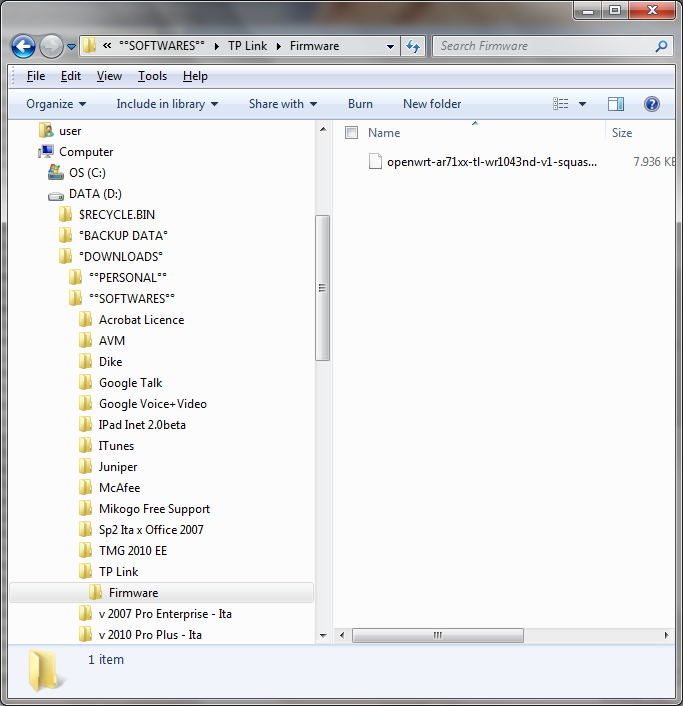
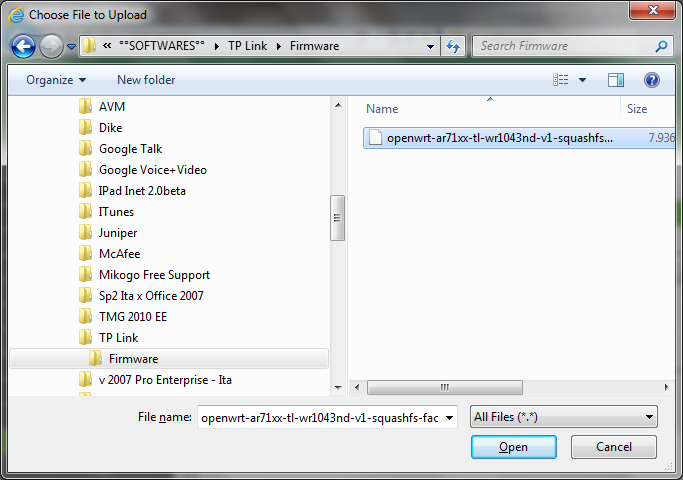
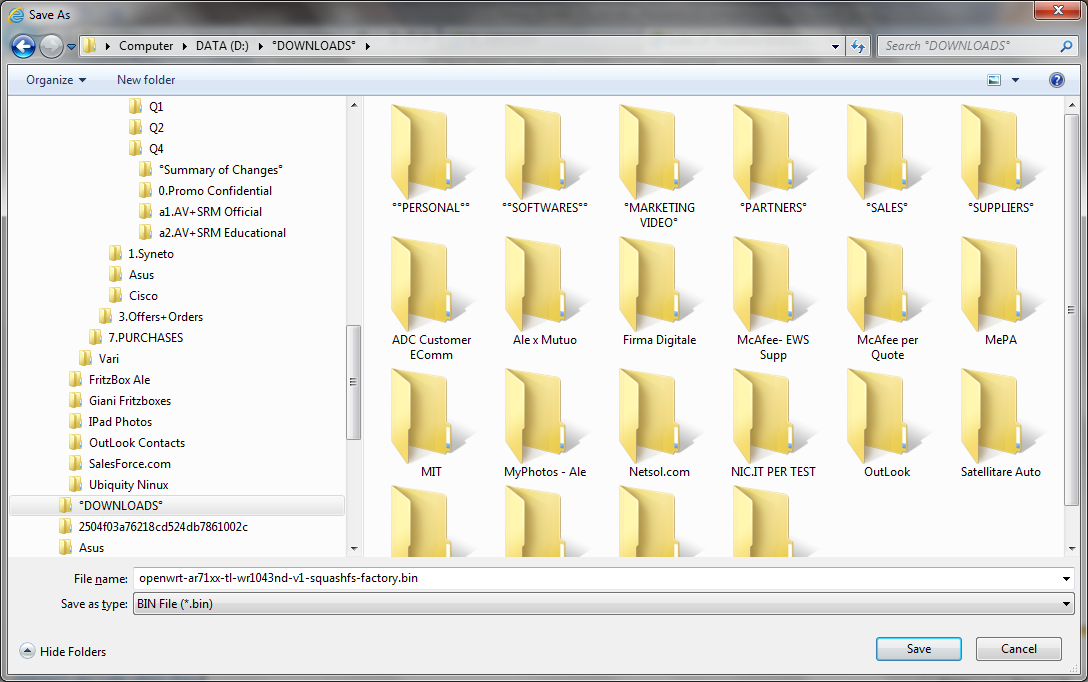
openwrt-ar71xx-tl-wr1043nd-v1-squashfs-factory.bin
1000000000000440000002AA904587AD.png

10000000000002AB000002C2F299AB51.png

10000000000002AB000001E023123FD9.png

10000201000002820000014BA0424FD3.png

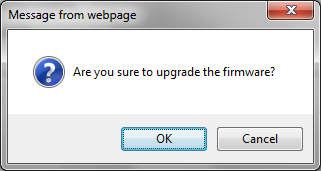
BEFORE UPGRADE CHECK YOUR BATTERY AND POWER !!!!
1000000000000141000000ABAA30F7E8.png

10000201000002820000014BFCA4EA56.png

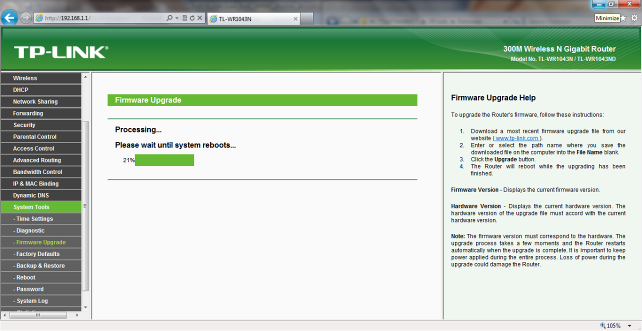
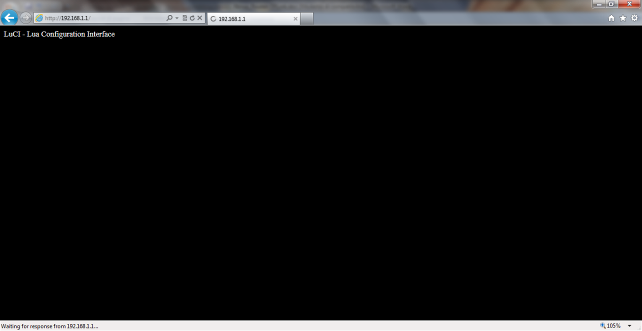
DO NOT UNPLUG CABLES OR POWERS !!!!!!
10000201000002820000014BBD88F171.png

10000201000002820000014BD48FBE55.png

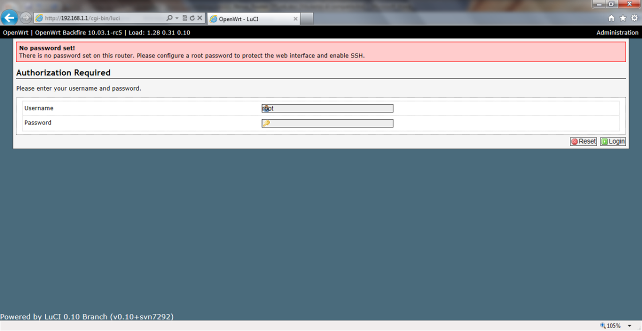
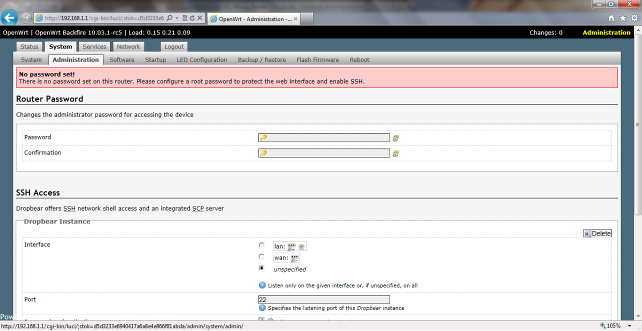
Username: root

Pwd: no password

10000201000002820000014B3855D933.png

Change your password in a group password “…….” (please share your password with NOC)
10000201000002820000014BB35777D4.png

10000201000002820000014BC73B16E4.png

Click “Save and Apply”

Networking: Attach Network Cable coming from “ISP Router” to the Internal Router “WAN” Port (e.g. TPLink)

If your ISP ha DHCP, your Internet connection must be enabled !!

Test: Ping

www.repubblica.it

  • or

www.ansa.it

  • or open your browser to “news.google.com” (If the web page doesn’t come out, please disable Browser Proxy settings)

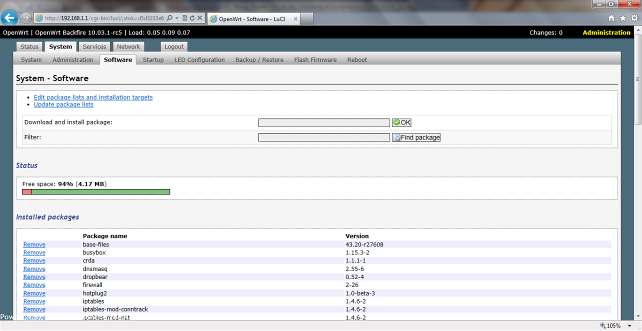
INSTALL ADDITIONAL SOFTWARE (UPDATE PACKAGE LIST)
10000201000002820000014B9C455108.png

Click “Update Package List”

10000201000002820000014BA635FFEC.png

The word “Updated List…..” represents the complete download.

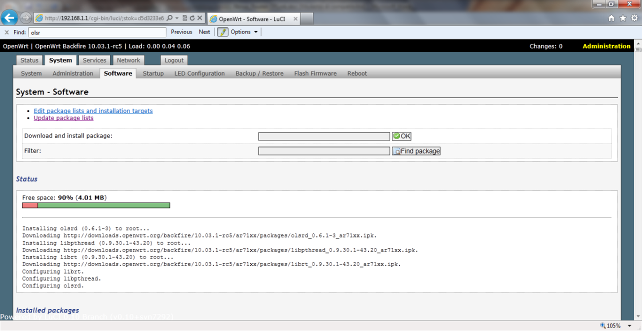
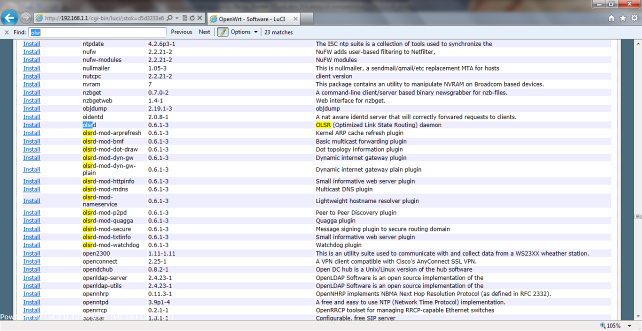
Find “OLSRD” (Use Find/Search in the browser !!)
10000201000002820000014BAB9DF3A8.png

Click “Install”

10000000000000FB000000ABEA6B6E7F.png

10000201000002820000014B80CC1545.png

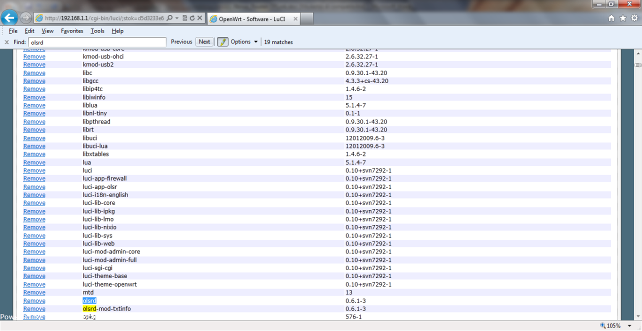
Configuring OLSRD” = Completed !

Check it:
10000201000002820000014B64C25409.png

Good!

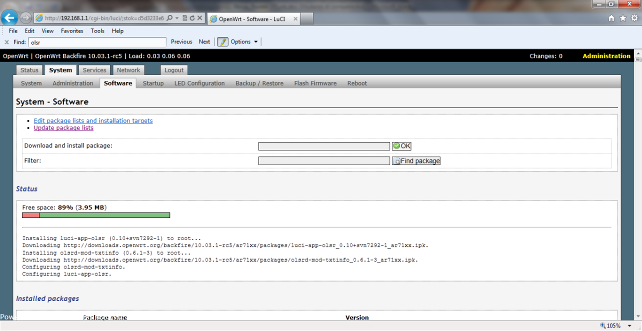
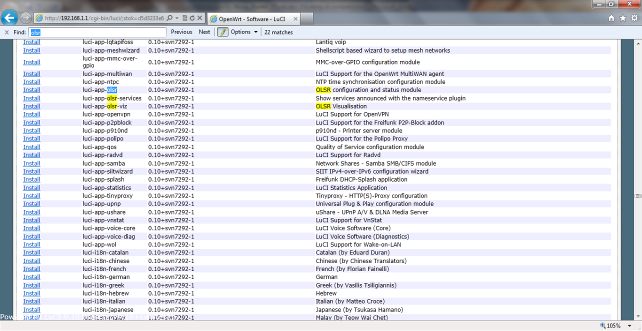
Install OSLD Grafic Interface “Luci-App-OLSRD”
10000201000002820000014B69D6A1A0.png

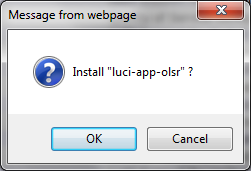
Clcik “Install”

10000000000000FB000000ABED067C2D.png

10000201000002820000014B2F09B470.png

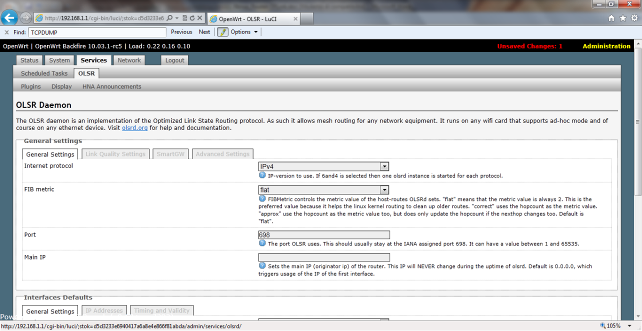
Configuring Luci-App-Olsrd” = Completed

Check if the Graphic Interface is enabled in the following tab:
10000201000002820000014B4B9243D9.png

Good !

BE CAREFUL: DO NOT START THE OLSRD Daemon/Service WITHOUT COMPLETING THE CONFIGURATION DESCRIBED BELOW

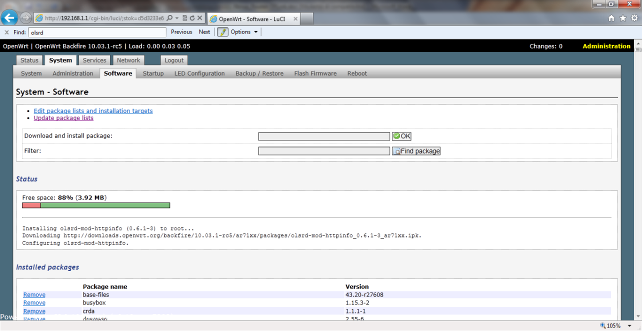
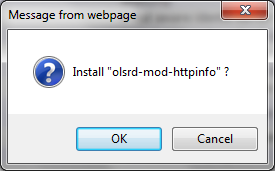
Install "olsrd-mod-httpinfo”
1000000000000113000000AB743ED884.png

10000201000002820000014B40A84489.png

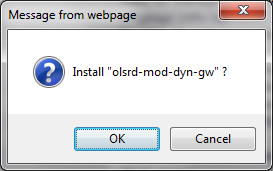
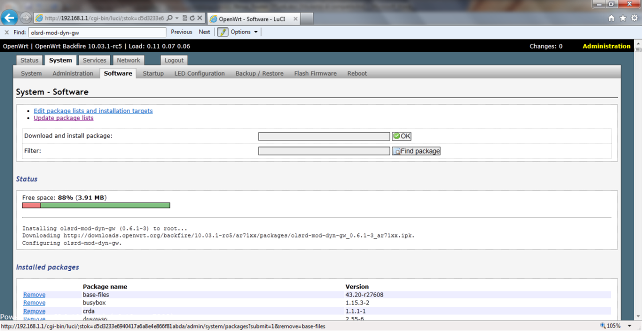
Install “olsrd-mod-dyn-gw”

1000000000000111000000ABFB66EC52.png

10000201000002820000014BD0A44783.png

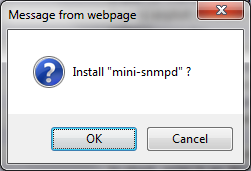
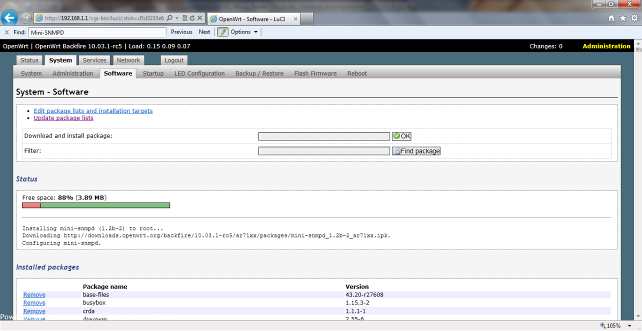
Install “Mini-SNMPD”

10000000000000FB000000AB806A6B05.png

10000201000002820000014B52508707.png

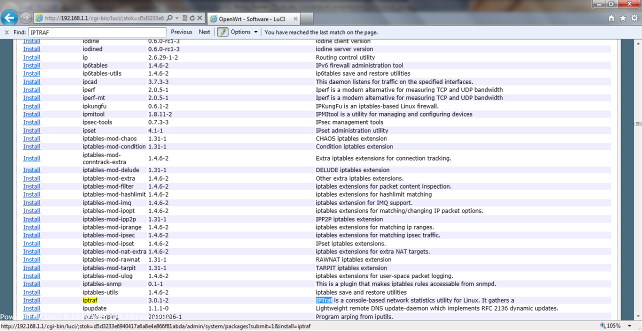
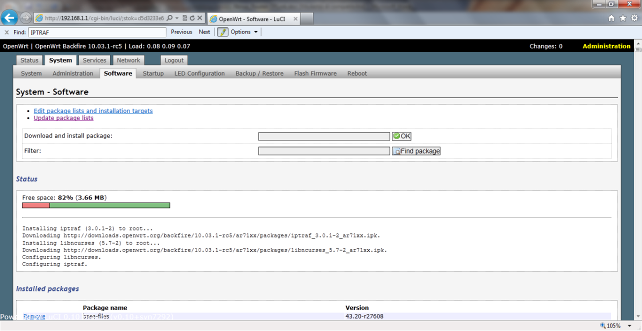
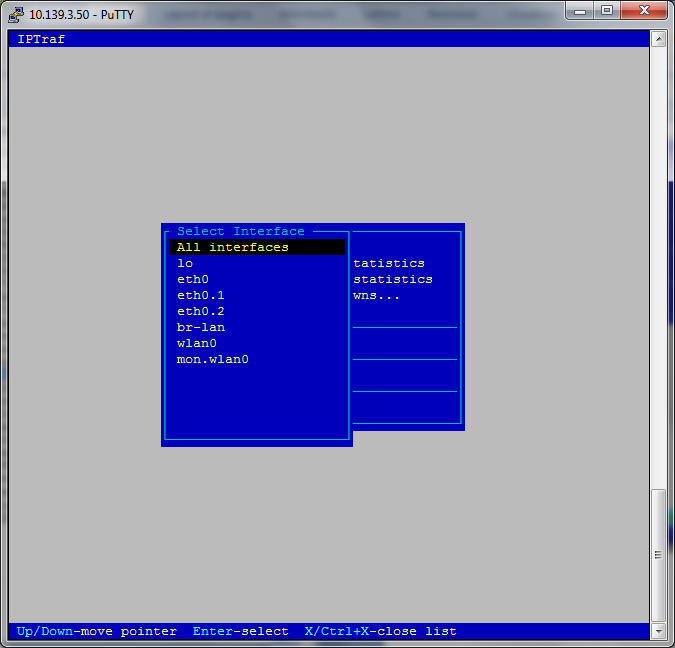
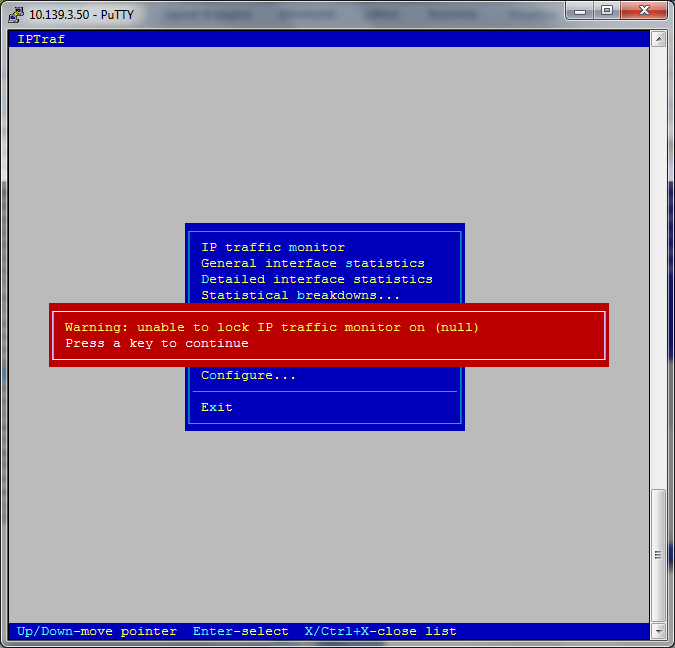
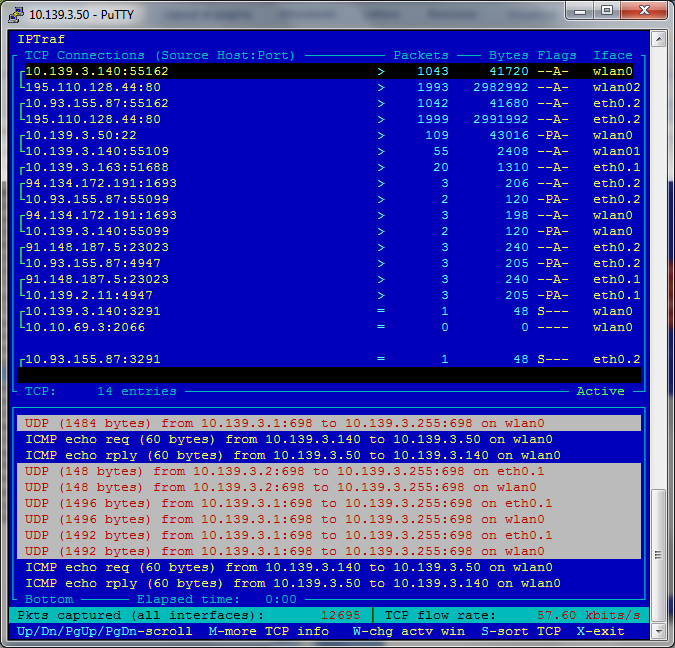
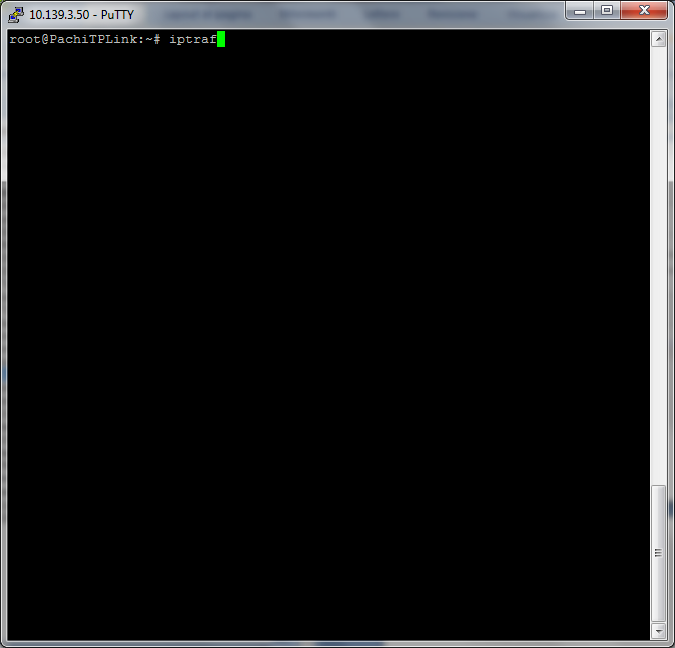
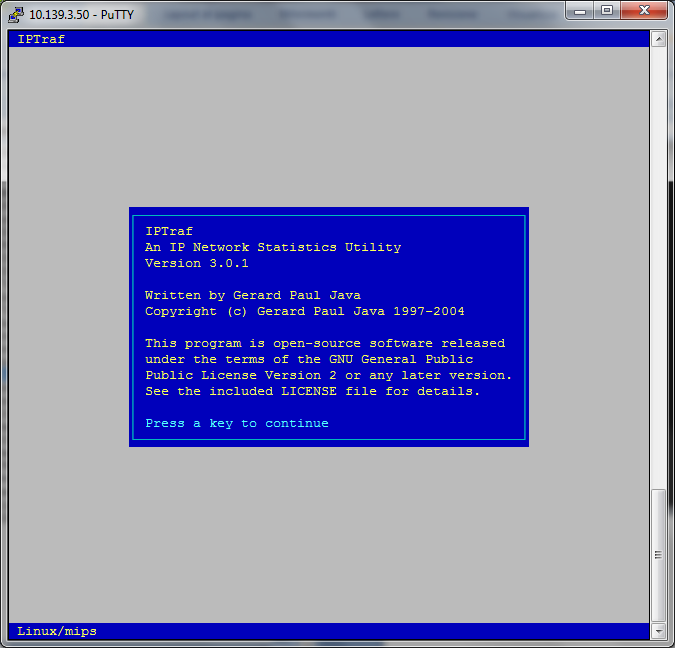
Install “IPTRAF”

10000201000002820000014B54A664F2.png

10000000000000FB000000ABB84495D7.png

10000201000002820000014B9DADC3DF.png

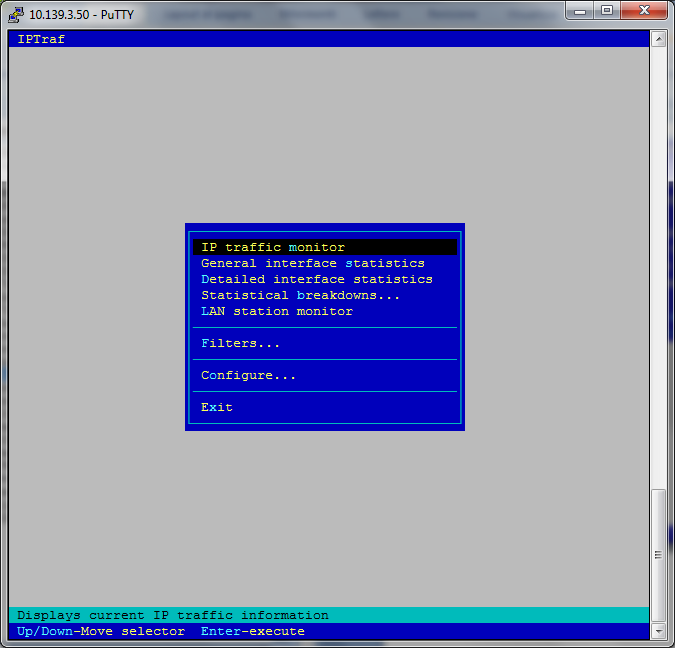
Check/Test:

Be careful: This command sometime disabled the Wi-Fi Service…..Reboot the device after this monitoring
10000000000002A300000288E15B4CD6.png

10000000000002A300000288A7F18ABA.png

10000000000002A3000002888936DA36.png

10000000000002A300000288758B181C.png

10000000000002A3000002881AD1447B.png

10000000000002A300000288E534FF77.png

ESC for exit

Remember to reboot the device for enabling WI-Fi again !!

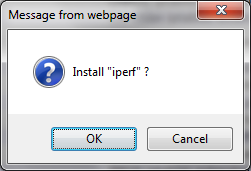
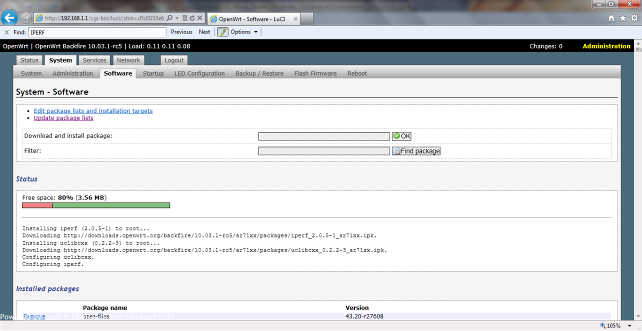
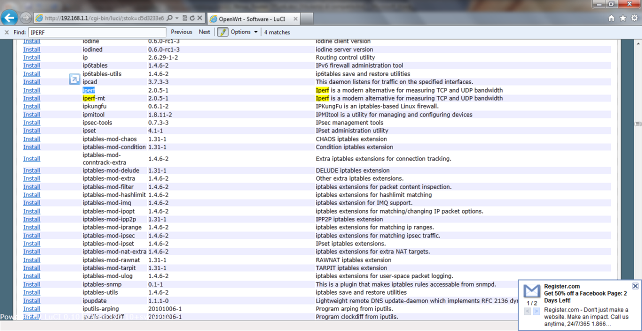
Install “IPERF”
10000201000002820000014B372333F1.png

10000000000000FB000000AB7BD61609.png

10000201000002820000014BB1627DA1.png

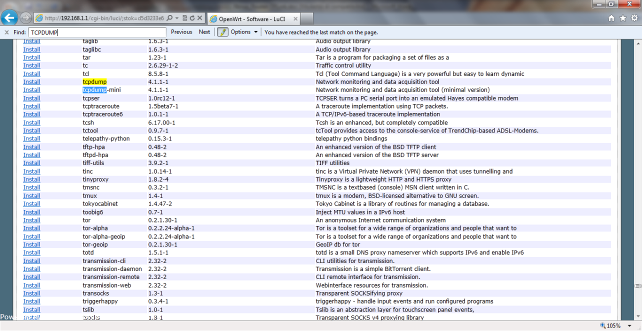
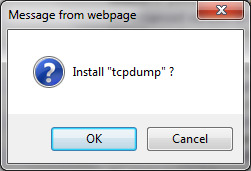
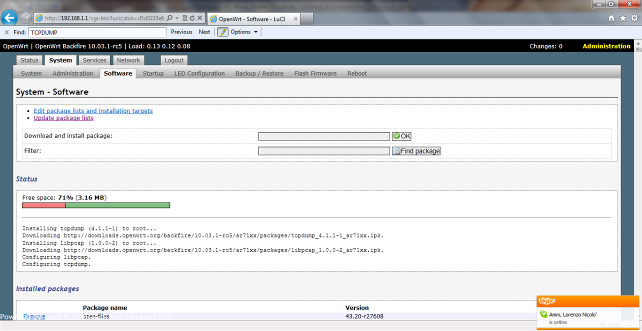
Install “TCPDUMP”

10000201000002820000014B1FBF567C.png

10000000000000FB000000ABACA8DFAE.png

10000201000002820000014B167EE43E.png

CONFIGURATION

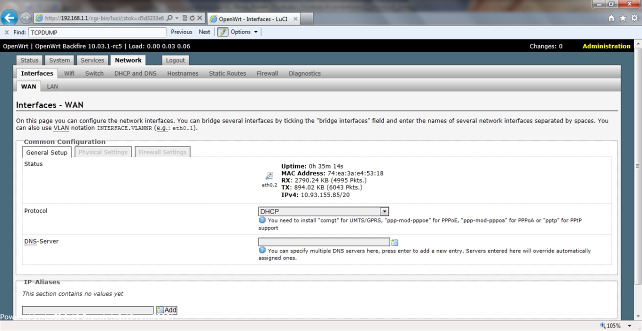
Network Configuration: WAN
10000201000002820000014B0419EE06.png

Check DHCP Is enabled: ok

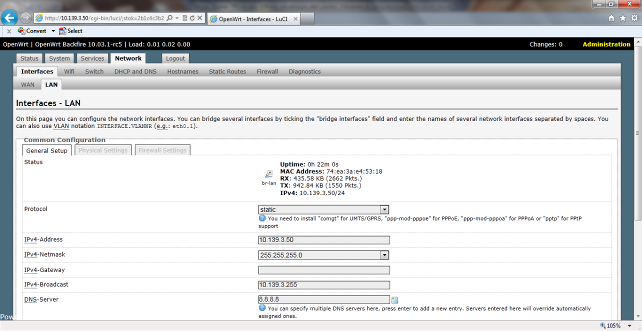
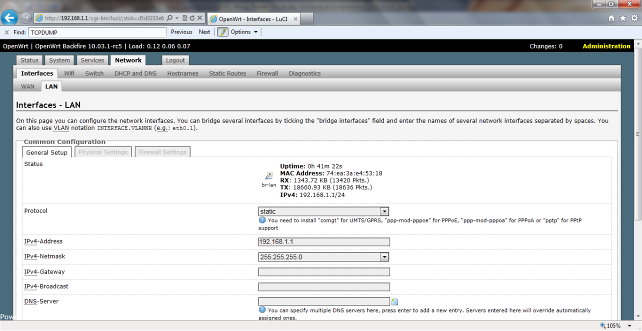
Network Configuration: LAN-Ninux

Default configuration: to change
10000201000002820000014BECF6736E.png

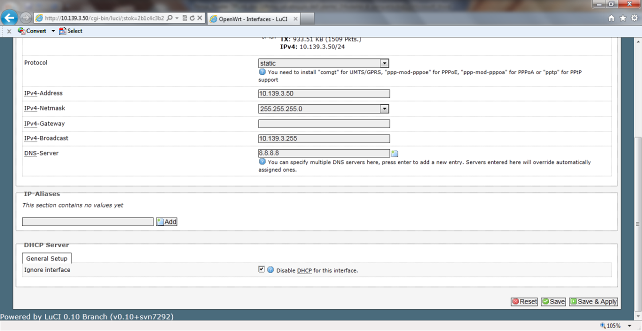
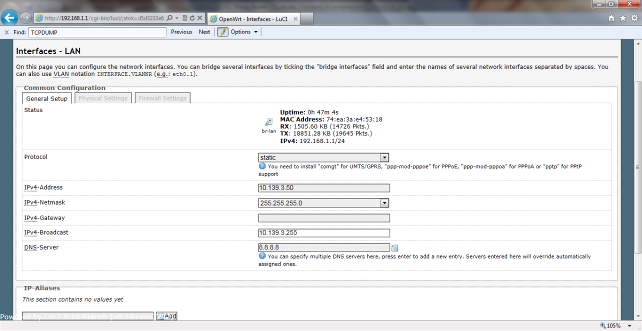
New User Configuration: IP: Ask for Ninux IP Address (DO NOT DO IT BY YOURSELF !!!!!!!!!!!!)

Usually IP-Ninux Address is: 10.zipcode.progressiveninuxcode.ipassignedfromninux

Gateway: NO Gateway (If OLSRD is enabled LEAVE IT OUT)

Example: IP LAN-Ninux 10.139.3.50
10000201000002820000014BBABFE6E1.png

Save and Apply” and wait 1-2 minutes (Router is going to be rebooted ….)

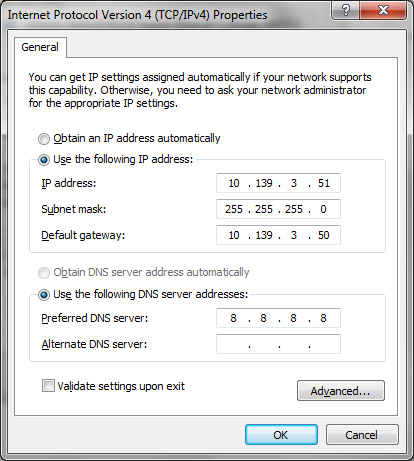
Unplug your network cable or wi-fi for and assign a IP compatible with you LAN-Ninux Network.

Example:
100000000000019E000001CD277B2BA5.png

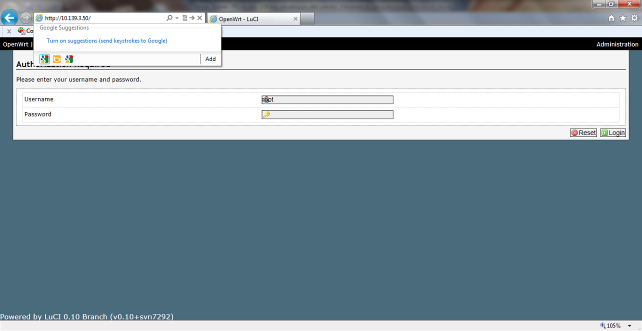
Check Internet connection on (e.g. ping, skype, browse, etc)
10000201000002820000014BF0503ADD.png

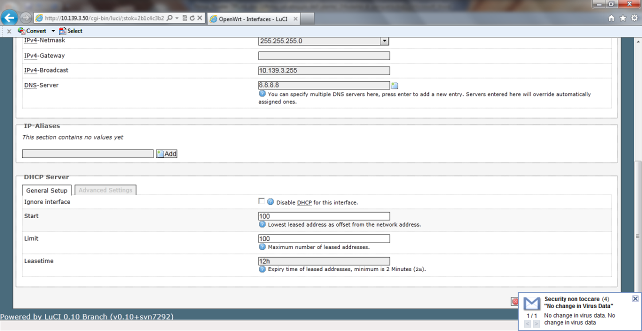
DHCP Server Configuration for LAN-Ninux Computer in your Building/home/office/etc.
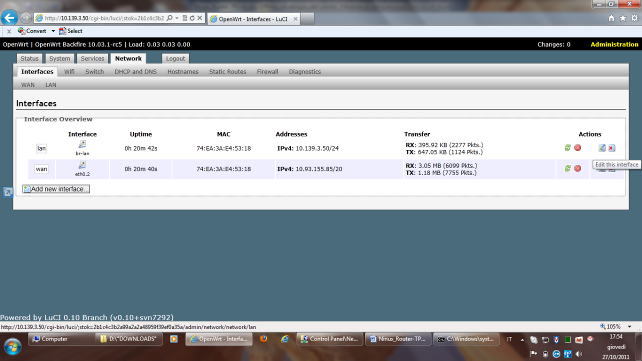
100002010000028200000169599A3478.png

10000201000002820000014B25A18BE4.png

10000201000002820000014B54814464.png

DHCP Server: Unflag “Disable DHCP for…”
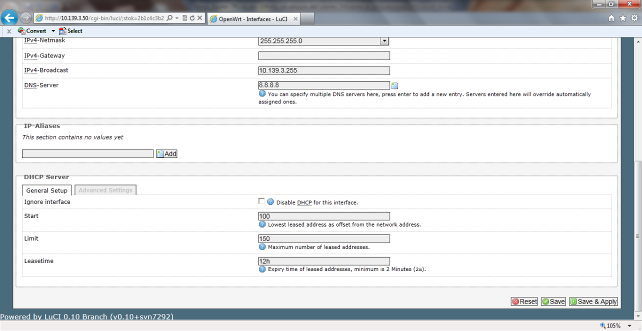
10000201000002820000014B0589B1E8.png

10000201000002820000014B2796A6DA.png

Save and Apply”

Check DHCP Server in your Lan-Ninux: Use your laptop computer in dhcp and test it if it works (Unplug and plug againg your cable after ip in dhcp)

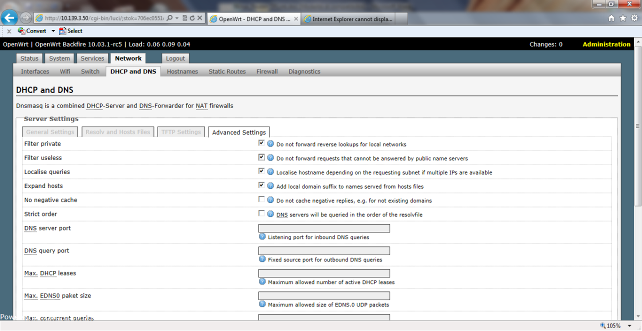
Filter Useless
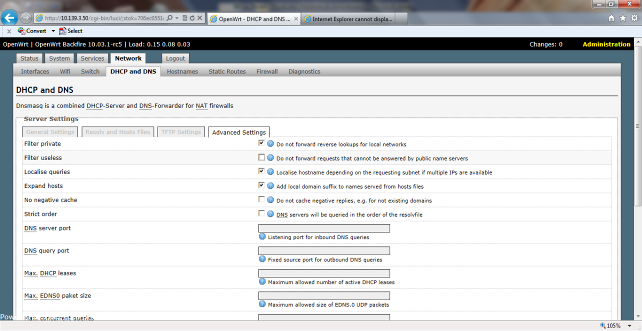
10000201000002820000014B5370782D.png

Enable:

10000201000002820000014B0177642F.png

DNS TUNING FOR INTERNAL DNS RESOLUTION THROUGH GOOGLE
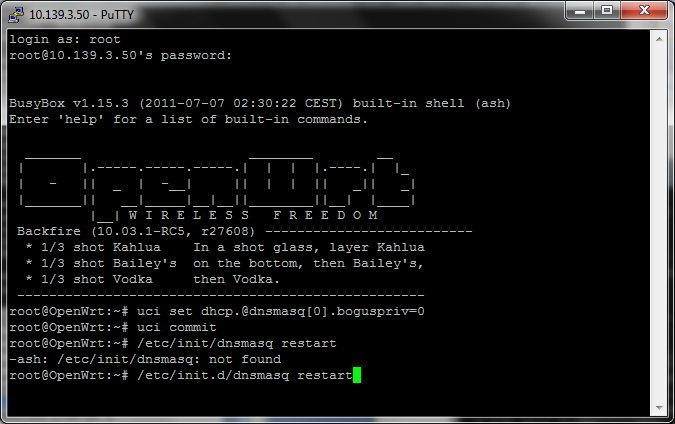
10000000000002A3000001A8B3CBD3A6.png

CONFIGURATION: WI-FI

100002010000028200000169174219F8.png

10000201000002820000014B43782549.png

Change in:

Enable Device: yes Channel: the empty channel (E.g. channel 4) SSID:

www.ninux.org

Save and Apply” and wait 10-20 secs

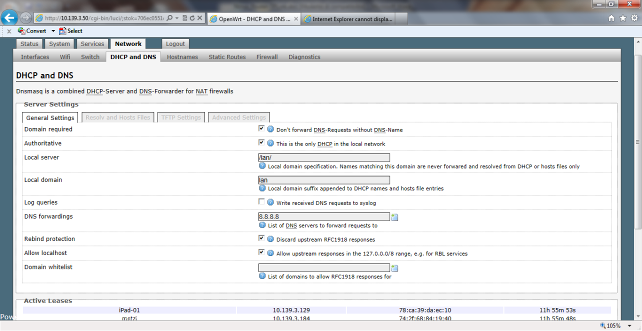
DNS FORWARDER CONFIGURATION

Add 8.8.8.8 in Dns Forwarder and “Save and Apply”
10000201000002820000014B3D1485BF.png

OLSRD CONFIGURATION & START

10000201000002820000014B4AF98103.png

10000201000002820000014BA2B06943.png

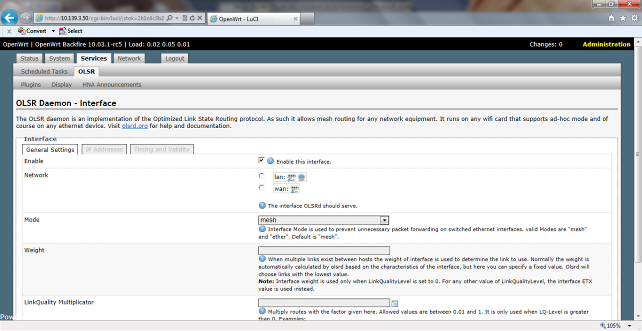
Edit Interface

10000201000002820000016985ACDFCB.png

10000201000002820000014B37D213FE.png

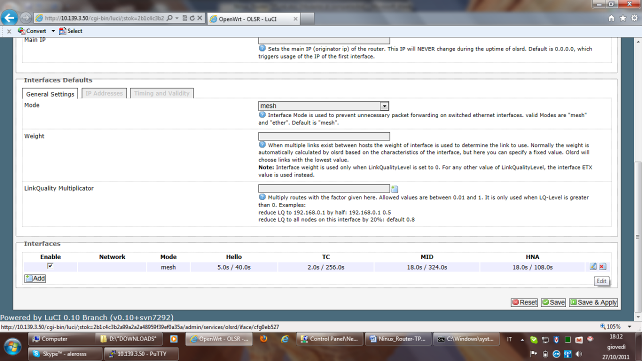
Change the default in :

Enable: “LAN” and click only “Save” (DO NOT CLICK Save and Apply” !!!!)

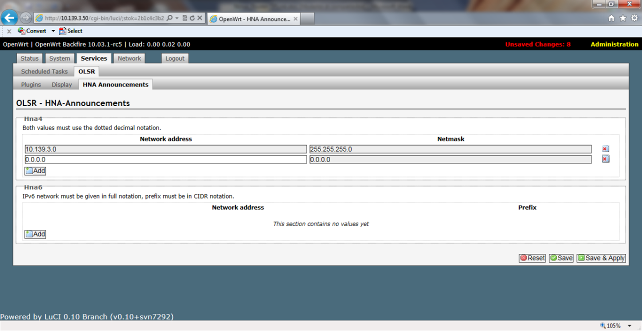
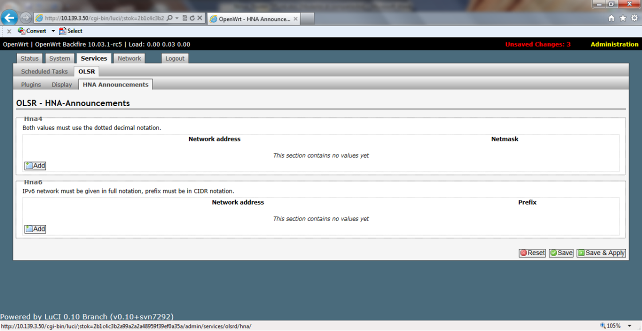
HNA Announcement
10000201000002820000014B5A295FB4.png

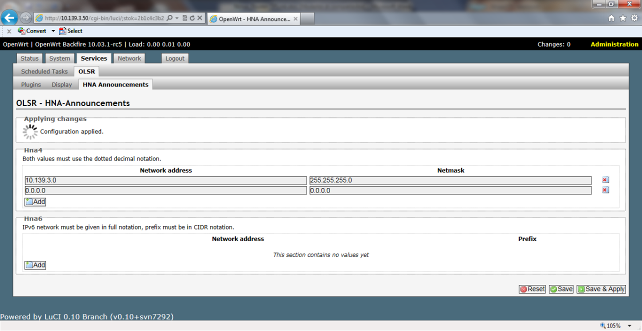
Add HNA4 (Host Network Announcement)

10000201000002820000014B6FEE6A27.png

“Save and Apply”

10000201000002820000014BDF8D553F.png

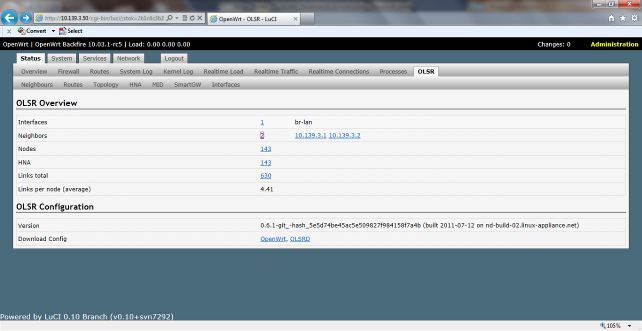
Check OLSRD if it’s working:

10000201000002820000014BACB8253B.png

Note: Attach Network Cable for “Wi-Fi Network Ninux” in LAN4

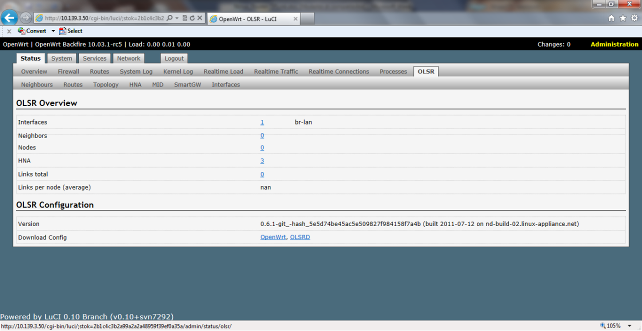
Check if “Neighbors” is populated
10000201000002820000014BA97778E7.png

Other information in Nodes, HNA 143, Links Total are secondary checks.

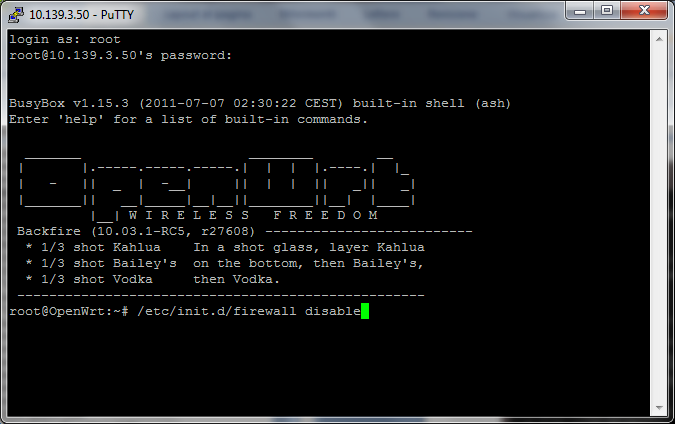
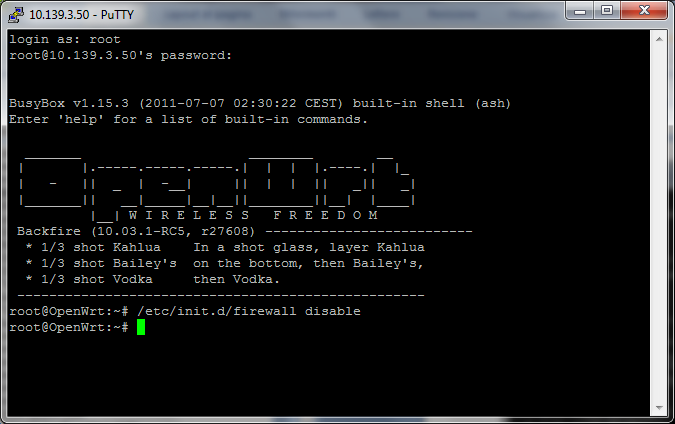
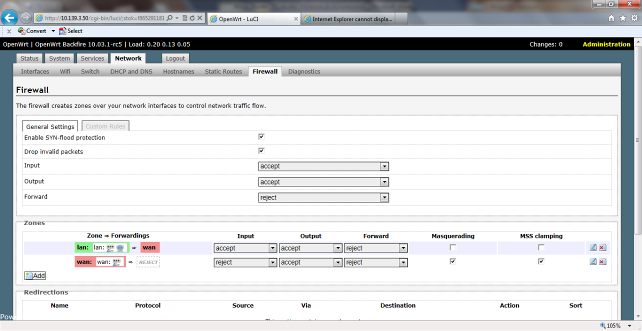
CONFIGURATION: FIREWALL DISABLED
10000201000002820000014BBA5BE051.png

10000000000002A3000001A8B2FA8704.png

10000000000002A3000001A8DDAEB922.png

10000000000002A3000001A8E6CB3B38.png

10000000000002A3000001A86CB700B7.png

Official Test

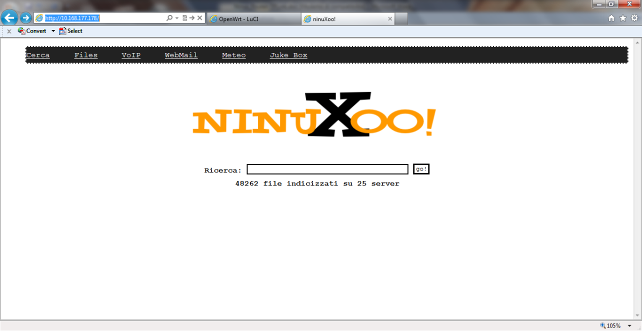
Open your browser to http://10.168.177.178/
10000201000002820000014BAD89EB1D.png

Open your browser to “ninuxoo.ninux.org”

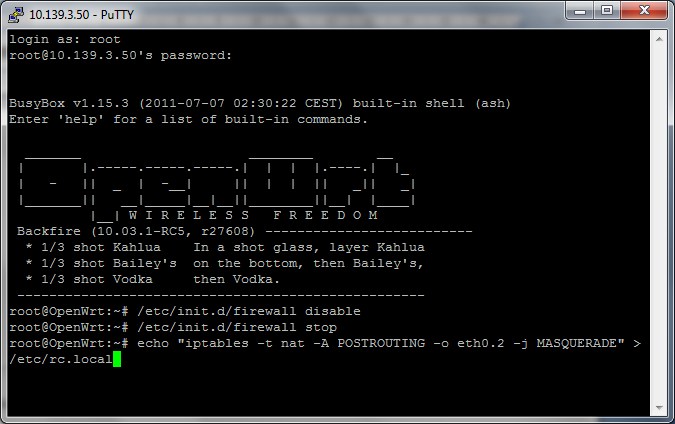
Note: If it doesn’t work there is a NAT Missing problem
10000000000002A3000001A8631A1B41.png

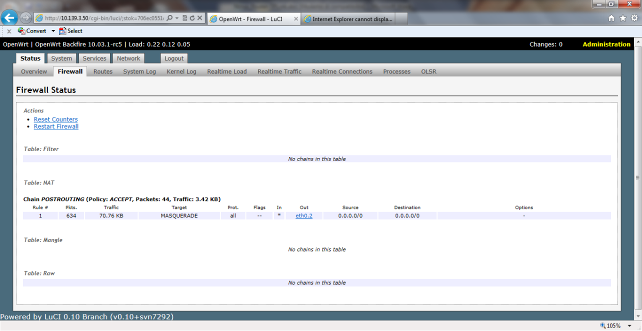
(This rule enable just the Nat basic firewall rule)
10000201000002820000014B90D2E8DF.png

NOTE: DO NOT CLICK “Restart Firewall”

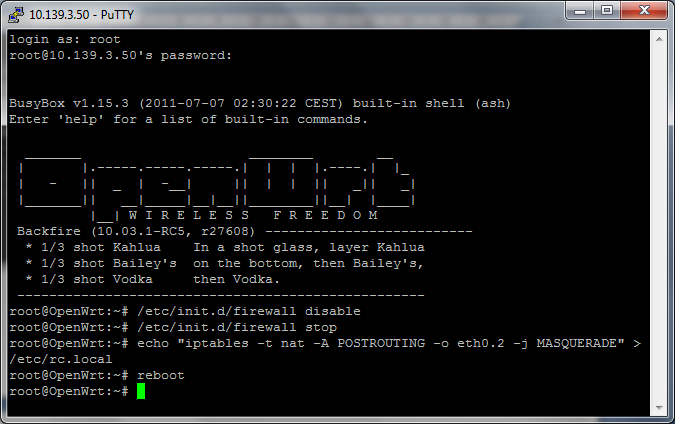
Reboot
10000000000002A3000001A8F0E06CBD.png

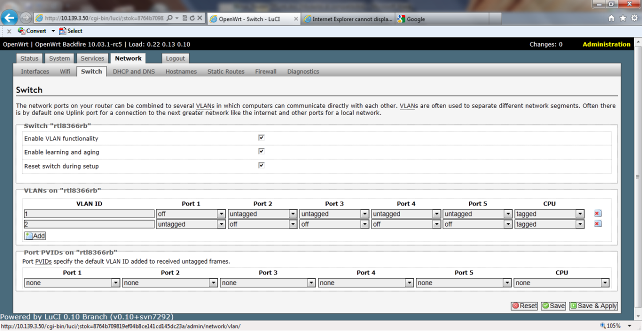
VLAN CONFIGURATION: ONLY FOR DIRECT CONNECTION TO ISP WITH PRIVATE NETWORK (e.g. Fastweb)

Tipical Application: peer-to-peer
10000201000002820000014B8DE7144D.png

Choose Port LAN1 for VLAN Configuration with ISP (network cable: unplugged)

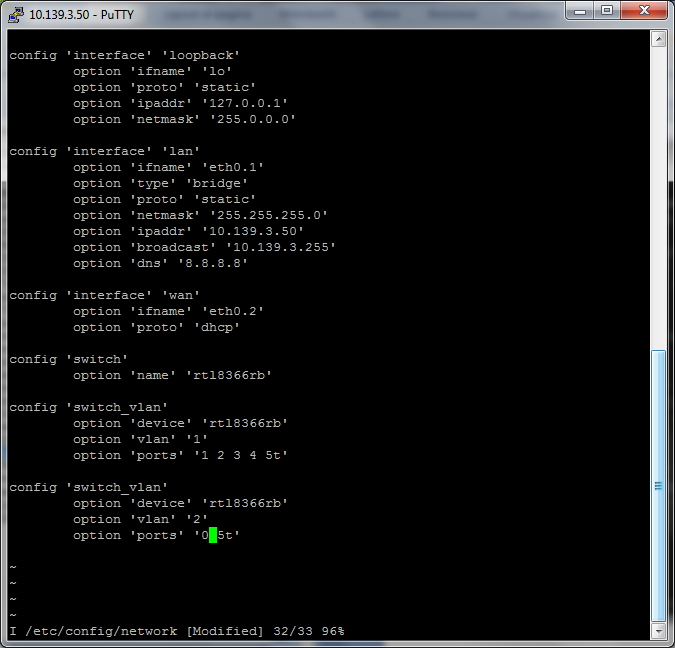
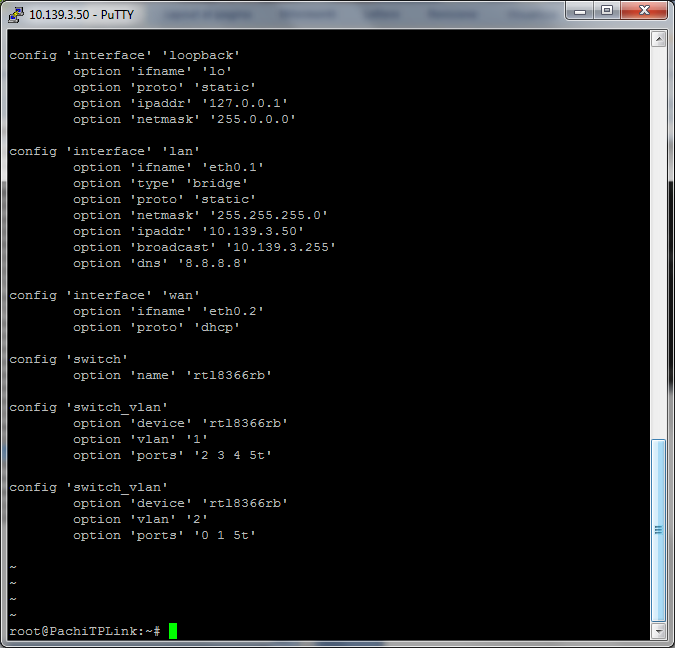
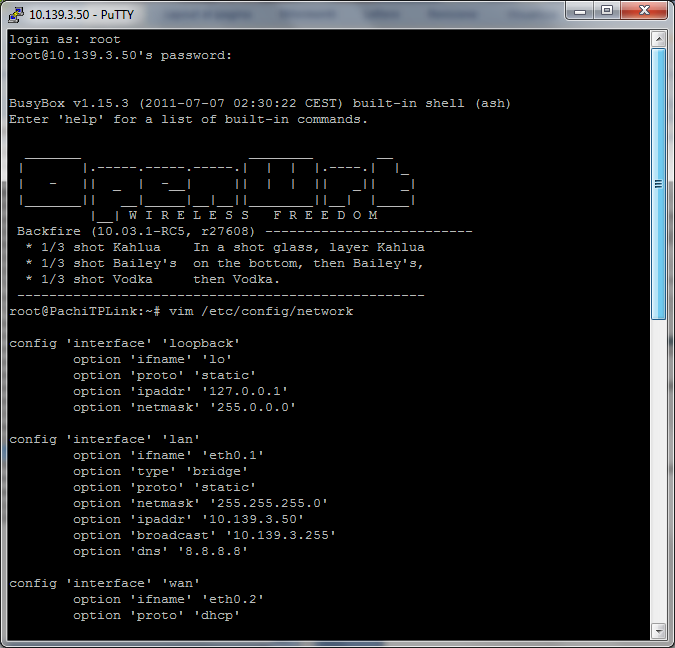
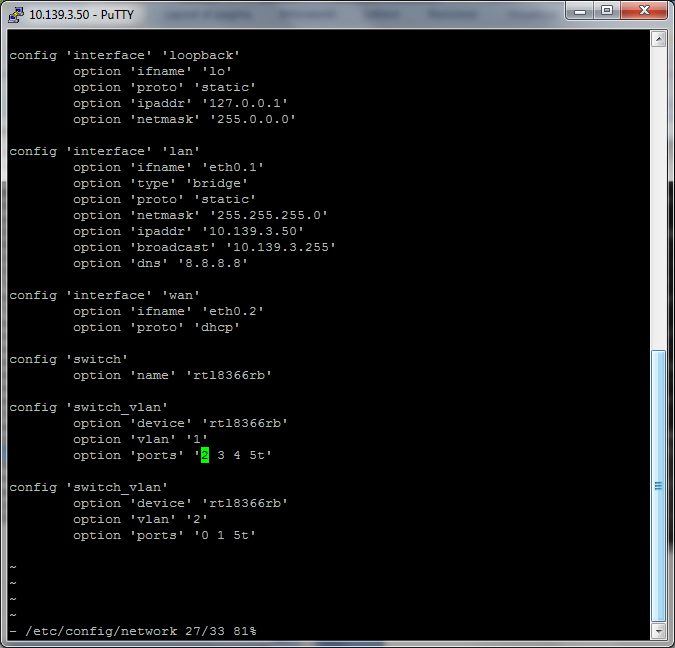
VLAN1: LAN VLAN2: WAN (ISP) Port2 (LAN1 phisical on the device)

DO NOT USE THE GUI
10000000000002A3000002883912E930.png

Before changes:

10000000000002A300000288C38AEE29.png

Final Configiration for VLAN on LAN1:
10000000000002A300000288FD660E64.png

Press “ESC” and digit

:wq” (enter)

10000000000002A30000028886B351C4.png

Check/Test:

  • Plug a cable on LAN1 with a Pc/Laptop with DHCP and test if this device received a ISP/Fastweb IP…and try to navigate..(Please check you don’t have a Ninux IP Address !!!!)

Reboot the device and test again !!

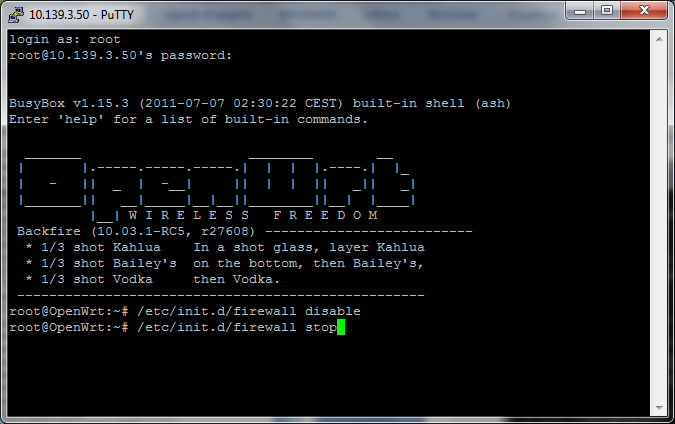
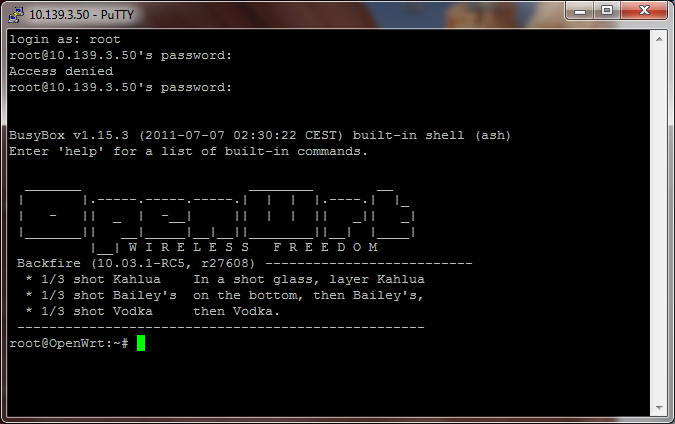
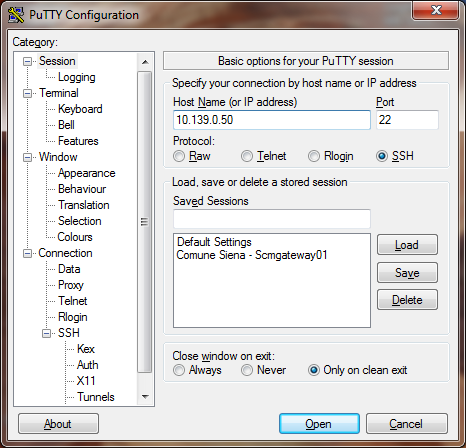
PUTTY: Expert Users Only
10000000000001D2000001C0B3ED3E0A.png

10000000000002A3000001A82C94AD55.png

TROUBLESHOOTING (CHAPTER 7)

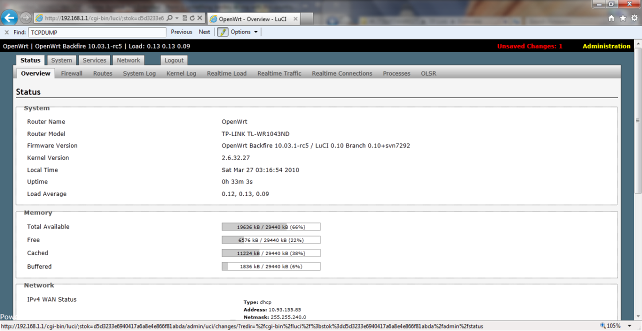
Problem:” Unsaved changes”
10000201000002820000014BE02EE101.png

Analisys

10000201000002820000014B1F5F8B28.png

Cause

Installing OLSRD, some changes were made to the network configuration and must be “applied”

Solutions

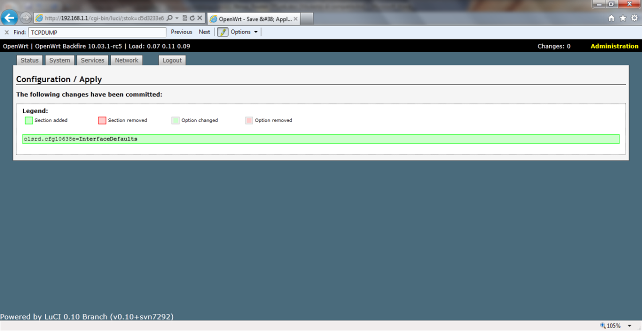
Click “Save and Apply”

Check: “Changes: 0” (right upper corner)=> ok
10000201000002820000014BC560ADBC.png

PROBLEM: LOOP LOCAL

Problem: Official Test is not working…No Ninux Internal web server are reachable

Cause:

M5 WI-FI have a “default gateway filled”

Solution:

Default gateway: empty (No filled!) Wi-Fi: Reboot your Antenna